Category Archives: Guide

women’s t shirt size guide

Discover the perfect fit with our comprehensive guide to women’s t-shirt sizes. Learn how to measure accurately and choose the right size for comfort and style, ensuring a flattering look.

Understanding Body Measurements for T-Shirt Sizing

Understanding body measurements is key to finding the perfect t-shirt fit. Measure your bust, waist, and hips accurately to determine your size and ensure comfort and style.

Importance of Accurate Measurements

Accurate body measurements are crucial for determining the correct t-shirt size, ensuring a comfortable and flattering fit. Incorrect measurements can lead to ill-fitting garments, which may result in discomfort or the need for returns. By taking precise measurements of your bust, waist, and hips, you can align your body dimensions with standard size charts. This helps in selecting a size that complements your silhouette, whether you prefer a slim, relaxed, or oversized fit. Consistent measurements also enable you to shop confidently across different brands, despite variations in sizing standards. Remember, accurate measurements are the foundation for a perfect fit, so take the time to measure carefully and regularly, as body dimensions can change over time. This ensures your t-shirts look and feel their best, every time.

How to Measure Your Body Correctly

To ensure accurate measurements for t-shirt sizing, use a flexible measuring tape and stand upright in comfortable clothing. For the bust, measure around the fullest part, keeping the tape level and parallel to the floor. The waist measurement is taken at the natural narrowest point, usually just above the belly button. Hips are measured around the widest part of the hips and buttocks, typically 7-9 inches below the waistline. When measuring, avoid pulling the tape too tight or leaving it too loose. Take measurements over the same undergarments you’d wear with the t-shirt for consistency. For the best results, measure twice and average the results. Accurate measurements are key to matching your body dimensions with the size chart, ensuring a comfortable and flattering fit.

Key Measurement Points: Bust, Waist, Hips

Accurate body measurements are essential for determining the perfect t-shirt size. The bust measurement is taken around the fullest part of the chest, ensuring the tape is level and parallel to the floor. The waist is measured at the natural narrowest point, typically just above the belly button. For hips, measure around the widest part of the hips and buttocks, usually 7-9 inches below the waistline. These three measurements—bust, waist, and hips—provide a comprehensive understanding of your body proportions. When measuring, wear a well-fitting bra and keep the tape snug but not tight. Standing up straight and relaxing your muscles will ensure precise results. These measurements are crucial for matching your body dimensions to the size chart, helping you find a t-shirt that offers both comfort and a flattering fit.

Standard Women’s T-Shirt Size Charts

Standard size charts for women’s t-shirts vary by region, with US, UK, and EU sizes offering different measurements. These charts help determine the best fit based on body measurements, ensuring comfort and style.

US Size Chart

The US size chart for women’s t-shirts is based on body measurements, primarily focusing on bust, waist, and hips. Sizes range from XXS to 4XL, with each size corresponding to specific inch measurements. For example, a size XS typically fits a bust of 28-30 inches, while a size L accommodates a bust of 38-40 inches. The chart also includes numerical sizes, such as 0-2 for XS, 4-6 for S, and so on. This system ensures a standardized approach to sizing, making it easier for women to find their perfect fit. However, variations may exist between brands, so referring to individual brand charts is recommended for accuracy. Using a flexible measuring tape to take accurate body measurements is crucial for selecting the correct size.

UK Size Chart

The UK size chart for women’s t-shirts provides a clear guide to finding the perfect fit based on standard measurements. Sizes typically range from 2XS to 4XL, corresponding to specific body measurements. For instance, a UK size 8 aligns with a bust measurement of 34-36 inches, while a size 16 fits a bust of 40-42 inches. The chart is designed to align with body measurements, ensuring accuracy and comfort. However, variations may occur between brands, so it’s essential to refer to individual brand size guides. To ensure the best fit, measure your bust, waist, and hips, and compare them to the UK size chart. This system helps women choose the right size for their body type, whether they prefer slim-fit, relaxed, or oversized styles. Always check the specific measurements to avoid sizing discrepancies and enjoy a comfortable, flattering fit.

EU Size Chart

The EU size chart for women’s t-shirts offers a standardized guide to help determine the ideal fit. Sizes typically range from 2XS to 5XL, correlating with specific body measurements. For example, an EU size 36 corresponds to a bust measurement of approximately 34-36 inches, while a size 44 fits a bust of 43-45 inches. This chart is designed to align with body measurements, ensuring accuracy and comfort across different brands. However, slight variations may exist, so checking individual brand guides is recommended. To find your perfect fit, measure your bust, waist, and hips, then compare these measurements to the EU size chart. This system allows women to select the right size for their body type, whether they prefer slim-fit, relaxed, or oversized styles. Always refer to the specific measurements to avoid sizing discrepancies and ensure a comfortable, flattering fit.

Different Fits Available

Women’s t-shirts come in various fits, including slim, relaxed, and oversized. Each style offers a unique comfort level, catering to different body types and personal preferences for a perfect look.

Slim Fit T-Shirts

Slim fit t-shirts are designed to hug the body closely, offering a modern and fashionable appearance. They are typically tailored to skim the curves without being overly tight, providing both comfort and style. This fit is ideal for women who prefer a more form-fitting silhouette that accentuates their physique. Slim fit tees are versatile and can be dressed up or down, making them suitable for various occasions. When choosing a slim fit, consider your body measurements to ensure the best fit, as sizes can vary slightly between brands. Pairing them with jeans or skirts creates a chic, contemporary look, while layering them under jackets adds a polished touch. Opting for a slim fit ensures a flattering and trendy wardrobe staple that complements diverse personal styles and preferences.

Relaxed Fit T-Shirts

Relaxed fit t-shirts offer a loose, comfortable silhouette, making them perfect for casual wear. Designed with a roomier cut through the chest and waist, these tees provide ease of movement and a laid-back style. The fabric drapes softly, creating a relaxed appearance without clinging to the body. Relaxed fit t-shirts are ideal for everyday use, layering, or lounging. They often feature a slightly longer length, which can be styled tucked in or left untucked for a relaxed vibe. This fit is great for those who prioritize comfort while still maintaining a stylish look. It’s also versatile, suiting various body types and personal fashion preferences. Whether you’re running errands or enjoying a weekend outing, a relaxed fit t-shirt is a practical and cozy choice for any casual occasion.

Oversized Fit T-Shirts

Oversized fit t-shirts are designed to be loose-fitting and comfortable, offering a trendy, relaxed silhouette. These tees are intentionally larger in design, often extending past the hips or even the thighs for a dramatic effect. They feature a boxy shape with dropped shoulders, creating a casual, laid-back look. Oversized t-shirts are perfect for layering or worn on their own for a stylish statement. The key to this fit is its roominess through the chest and waist, providing maximum comfort and flexibility.Fabric choices vary, but many oversized tees are made from soft, breathable materials for added relaxation. This fit is ideal for those who prefer a more relaxed, fashion-forward style. It can be easily paired with leggings, jeans, or even worn as a dress for a versatile look. Oversized t-shirts are a great choice for anyone seeking comfort without sacrificing style.

Body Measurements and Their Relation to T-Shirt Sizes

Body measurements like bust, waist, hips, and shoulders are crucial for determining the correct t-shirt size. Accurate measurements ensure a comfortable, well-fitting garment tailored to your shape.

Bust Measurement and T-Shirt Fit

The bust measurement is a key factor in determining the fit of a women’s t-shirt. It is measured around the fullest part of the chest, ensuring the tape is parallel to the floor. This measurement helps identify the appropriate size, ensuring comfort and a flattering appearance. A well-fitting t-shirt should neither be too tight nor too loose, allowing for ease of movement. Accurate bust measurements are essential, especially for styles that offer stretch orstructure. Variations in sizing between brands can affect the fit, so consulting a size chart is recommended. Proper fit prevents issues like gapping or restriction, making the bust measurement a critical component in selecting the right t-shirt size.

Waist Measurement and T-Shirt Fit

The waist measurement is a crucial factor in determining the fit of a t-shirt, particularly for styles that emphasize comfort and a defined silhouette. It is typically measured around the natural waistline, the narrowest part of the torso, usually just above the belly button. This measurement helps in selecting a size that ensures the t-shirt is neither too tight nor too loose, providing optimal comfort and movement. For slim-fit t-shirts, a smaller waist measurement may be more flattering, while a relaxed fit could be preferable for those with a larger waist. Accurate waist measurements are essential to avoid ill-fitting garments, and using a flexible tape measure while standing straight is recommended. Additionally, consulting brand-specific size charts is advisable, as sizing can vary between brands. Understanding how waist measurements interact with other body measurements, like the bust, can further enhance the accuracy of size selection, ensuring a tailored fit for various t-shirt styles, including cropped or longer designs. This attention to detail helps in achieving a comfortable and flattering look, making waist measurement a key component in choosing the right t-shirt size.

Hips Measurement and T-Shirt Fit

Hips measurement is a significant factor in ensuring a well-fitting t-shirt, especially for styles that accentuate the lower torso. It is typically measured around the widest part of the hips, approximately 7-9 inches below the waistline. This measurement is crucial for determining how the t-shirt will drape over the body, particularly for longer or fitted styles. A t-shirt that fits well around the hips can enhance both comfort and aesthetic appeal. For those with a curvier silhouette, ensuring the hips measurement aligns with the size chart can prevent the t-shirt from being too tight or restrictive. Conversely, those with a slimmer lower body may find a more tailored fit preferable. Accurate hip measurements, combined with waist and bust measurements, help in selecting a size that offers the best balance of comfort and style. This ensures the t-shirt neither clings too tightly nor hangs too loosely, providing a flattering and comfortable fit for various body types and t-shirt designs. By considering hip measurements, individuals can make more informed decisions when choosing their t-shirt size, leading to a more satisfying and personalized wardrobe choice. This attention to detail is essential for achieving a polished and comfortable look in everyday wear.

Shoulder Measurement and T-Shirt Fit

Shoulder measurement plays a key role in determining the fit of a t-shirt, as it affects how the garment sits on the body. The shoulder measurement is typically taken from the base of the neck, across the shoulder, and down to the elbow, ensuring the sleeve length and fit are appropriate. A well-fitting t-shirt should neither be too tight nor too loose across the shoulders, as this can impact both comfort and appearance. For broader shoulders, a slightly larger size may be necessary to avoid restrictive movement, while narrower shoulders may prefer a slimmer fit to maintain a balanced look. The shoulder measurement also influences the overall drape of the t-shirt, particularly for styles with specific sleeve lengths or necklines. Accurate shoulder measurements ensure the t-shirt aligns with the body’s natural proportions, creating a polished and comfortable fit. This measurement is especially important for achieving a seamless look in both casual and tailored designs.

Length Measurement and T-Shirt Fit

Length measurement is crucial for ensuring a t-shirt fits well and meets personal style preferences. The length is measured from the highest point of the shoulder to the hemline, determining how the t-shirt sits on the torso. A longer length provides coverage and can be flattering for taller individuals or those who prefer a more relaxed fit. Conversely, shorter lengths are ideal for petite frames or for layering under jackets. Proper length ensures the t-shirt is neither too short, exposing the midriff, nor too long, overwhelming the silhouette. For tall sizes, an additional 1.75-4.5cm in length is often added to regular tops to accommodate taller women. This measurement, combined with other body metrics, helps in selecting a t-shirt that offers comfort, style, and proportionate fit, making it essential for achieving the desired aesthetic and functionality.

Specialized T-Shirt Sizes

Specialized t-shirt sizes cater to diverse needs, including tall, petite, and plus sizes, ensuring a perfect fit for every body type with tailored designs and measurements.

Tall T-Shirt Sizes

Tall t-shirt sizes are designed for women who are 5’10” or taller, offering longer lengths and proportionally adjusted sleeves for a flattering fit. These styles ensure coverage and comfort, preventing the shirt from appearing too short. Brands often add 1.75-4.5cm to the length compared to regular sizes, while sleeve lengths are adjusted to match the silhouette. Tall sizes are available in various fits, from slim to oversized, catering to different preferences. When choosing a tall size, consider whether you prefer a tighter or looser fit, as some styles may overlap in measurements. Always refer to the specific brand’s size chart, as tall sizing can vary slightly between brands. This ensures the best fit and comfort for taller women seeking stylish and functional tees.

Petite T-Shirt Sizes

Petite t-shirt sizes are tailored for women with a shorter stature, typically under 5’4″, ensuring a flattering and proportionate fit. These designs feature shorter sleeve lengths, narrower shoulder measurements, and a reduced overall length to accommodate smaller frames. Petite sizes maintain the same bust and waist proportions as standard sizes but are scaled down to prevent excess fabric. This ensures the t-shirt sits correctly on the body without appearing oversized. Petite fits are available in various styles, from slim-fit to relaxed, catering to different preferences. By choosing petite sizes, shorter women can enjoy a more tailored look that enhances their silhouette. Always consult the brand’s size chart, as petite sizing may vary slightly between brands, ensuring the best fit for comfort and style.

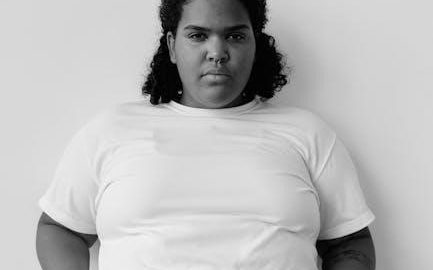
Plus Size T-Shirt Sizes

Plus size t-shirt sizes cater to women who prefer a looser, more comfortable fit, often designed to flatter curvier figures. These sizes typically range from 1XL to 4XL, offering a broader fit across the bust, waist, and hips. Plus-size t-shirts are crafted to ensure comfort without compromising style, with features like longer lengths to provide coverage and elastic fabrics for a snug yet relaxed feel. Many brands offer inclusive sizing, ensuring that plus-size options are available in various styles, from slim-fit to oversized. When shopping for plus sizes, it’s essential to refer to the brand’s specific size chart, as measurements can vary. This ensures the best fit and allows women to enjoy a confident, stylish look while maintaining comfort throughout the day.

How to Choose the Right T-Shirt Size

Measure your body accurately, consult the size chart, and consider your fit preference. Check for brand-specific variations, try different sizes if needed, and ensure a comfortable, flattering look with the perfect fit.

When to Size Up for Comfort

Considering comfort, size up if you prefer a relaxed fit or find a smaller size restrictive. This ensures ease of movement and reduces tightness, especially around the bust and shoulders. Additionally, sizing up can prevent fabric from feeling stretched or uncomfortable, particularly for those who value a looser silhouette. If you’re between sizes or prefer a more casual look, opting for the next size up can enhance wearability and overall satisfaction. Many find that sizing up provides a better drape and reduces clinginess, making it ideal for everyday wear or layering. Always refer to the specific brand’s size chart, as fit preferences vary, but sizing up often leads to a more comfortable and flattering choice.

Understanding Brand Size Variations

Brand size variations can make selecting the right t-shirt size challenging. Different brands often have unique sizing standards, and what fits as a medium in one brand may not in another. This discrepancy arises from varying measurement criteria, fit preferences, and fabric types. Some brands cater to specific body types, while others focus on fashion trends. To navigate this, always refer to the brand’s specific size chart, as they often provide detailed body measurements. Additionally, consider the fabric’s stretchiness, as materials like cotton or elastane offer different comfort levels. Reading reviews or sizing guides from other customers can also provide insights. By understanding these variations, you can make informed decisions and find a t-shirt that aligns with your comfort and style preferences. Always double-check measurements before making a purchase to ensure the best fit.

Using Size Charts Effectively

Using size charts effectively is key to finding your perfect t-shirt fit. Start by accurately measuring your bust, waist, and hips with a flexible tape measure. Compare these measurements to the brand’s size chart, ensuring alignment with their specific sizing standards. Pay attention to whether the chart uses body measurements or garment measurements, as this can affect fit. For example, if a chart lists chest measurements, match yours to the closest range. Consider the fit type—slim, relaxed, or oversized—and how it aligns with your preferences. If you’re between sizes, consider the fabric’s stretch and whether you prefer a snug or loose fit. Double-checking the size chart against your measurements helps minimize sizing errors. By following these steps, you can confidently select the right size for a comfortable and flattering t-shirt.

Mastering the women’s t-shirt size guide ensures a perfect fit every time. By understanding your body measurements and comparing them to size charts, you can confidently select the right size for comfort and style. Remember, sizing varies between brands, so always refer to specific charts. Whether you prefer slim, relaxed, or oversized fits, accurate measurements are key. Don’t hesitate to size up for comfort or consider specialized sizes like tall, petite, or plus sizes. With patience and the right tools, finding your ideal t-shirt size becomes effortless, ensuring you look and feel great in every shirt you wear.

laser drill guide

Laser drill guides revolutionize drilling accuracy by projecting precise alignment patterns‚ ensuring straight and perfectly centered holes. Tools like the BullseyeBore offer enhanced precision and versatility for professionals and DIYers alike.

What is a Laser Drill Guide?

A laser drill guide is a tool that enhances drilling accuracy by projecting a laser beam or pattern onto the workpiece. It ensures precise alignment‚ helping users drill straight and centered holes. These guides are compatible with various drills and bits‚ offering versatility across materials like wood‚ metal‚ and more. Unlike traditional guides‚ laser versions provide real-time visual feedback‚ reducing errors and improving efficiency. They are ideal for both professionals and DIY enthusiasts‚ making complex drilling tasks easier and more accurate. This technology eliminates guesswork‚ ensuring consistent results in various projects and applications.

Purpose and Benefits of Using a Laser Drill Guide

A laser drill guide enhances precision by projecting alignment patterns‚ ensuring accurate and straight holes. It simplifies drilling for both professionals and DIYers‚ reducing errors and saving time. Versatile across materials like wood‚ metal‚ and masonry‚ it improves project efficiency. The tool prevents surface damage and offers real-time feedback‚ making it ideal for various applications. By eliminating guesswork‚ it boosts confidence in achieving professional-grade results. Its portability and compatibility with common drills make it a valuable addition to any toolkit‚ ensuring consistent accuracy and reducing the risk of costly mistakes in woodworking‚ metalworking‚ and beyond.

History and Evolution of Laser Drill Guides

Laser drill guides emerged as a modern solution to traditional drilling challenges. Introduced in 2015 by Cerwin Tools with the BullseyeBore‚ they revolutionized precision drilling‚ enhancing accuracy and accessibility for professionals and DIYers alike.

From Traditional Drill Guides to Laser Technology

Traditional drill guides relied on physical templates or alignment tools‚ often limiting precision and obstructing visibility. The shift to laser technology introduced devices like the BullseyeBore‚ which projects alignment patterns for unparalleled accuracy. This innovation eliminated the need for physical contact with the work surface‚ reducing damage risks. Laser guides also offered real-time feedback‚ enabling instant adjustments. Their compact design and versatility across materials and orientations made them indispensable for both professionals and DIY enthusiasts‚ marking a significant leap in drilling technology and efficiency compared to conventional methods.

Key Innovations in Laser Drill Guide Development

Recent advancements in laser drill guides include improved beam accuracy‚ compact designs‚ and enhanced safety features. The BullseyeBore Core introduced a unique alignment system‚ projecting concentric circles for precise drilling. Innovations like automatic shut-off upon obstruction and compatibility with various drill bits have elevated functionality. These tools now work in any orientation‚ making them versatile for diverse projects. Integration of user-friendly interfaces and durable materials ensures longevity and ease of use‚ catering to both professionals and hobbyists. These innovations have significantly enhanced drilling precision and safety‚ setting new standards in the industry.

Key Features of Laser Drill Guides

Laser drill guides enhance accuracy‚ offering precise alignment and real-time feedback. They are versatile for various materials‚ easy to use‚ and feature safety mechanisms to prevent errors and injuries.

Enhanced Accuracy and Precision

Laser drill guides deliver unmatched precision by projecting clear alignment patterns‚ ensuring perfectly straight and centered holes. Tools like the BullseyeBore use circular patterns to indicate perpendicular alignment‚ eliminating guesswork. This technology allows users to achieve consistent accuracy‚ even in complex projects. The real-time visual feedback enables immediate adjustments‚ reducing errors and improving drilling quality. Whether for woodworking‚ metalworking‚ or industrial applications‚ laser guides minimize misalignment and enhance control‚ making them indispensable for professionals and DIYers seeking precise results. Their ability to maintain accuracy across various materials and orientations sets them apart from traditional methods.

Ease of Use for DIY and Professional Projects

Laser drill guides are designed for simplicity‚ making them accessible to both DIY enthusiasts and professionals. Their intuitive design allows quick alignment and setup‚ ensuring precise results with minimal effort. Tools like the BullseyeBore Core attach effortlessly to drills‚ providing clear visual feedback for accurate hole placement. Professionals appreciate the time-saving features‚ while DIYers benefit from the user-friendly interface that minimizes errors. The guides work seamlessly across various materials and orientations‚ offering versatility without compromising ease of use. Whether for intricate woodworking or industrial applications‚ laser drill guides simplify the process‚ making them an essential tool for all skill levels.

Versatility Across Different Materials

Laser drill guides excel in their adaptability to various materials‚ from wood and metal to glass and plastics. Tools like the BullseyeBore Core ensure precise alignment on any surface‚ preventing damage and enhancing accuracy. Their ability to work in multiple orientations—whether vertical‚ horizontal‚ or diagonal—makes them ideal for diverse projects. The guides are compatible with standard drill bits‚ including spade‚ step‚ and masonry bits‚ allowing for consistent performance across different materials. This versatility ensures that laser drill guides remain a reliable choice for both woodworking enthusiasts and industrial professionals‚ delivering consistent results regardless of the material or application.

Safety Features and Error Prevention

Laser drill guides incorporate advanced safety features to prevent accidents and ensure error-free drilling. The BullseyeBore Core‚ for instance‚ automatically disconnects if an obstruction is detected‚ halting rotation to avoid damage or injury. Its design prevents contact with the work surface‚ reducing the risk of scratching or marring materials. Additionally‚ the laser’s real-time alignment system alerts users to misalignment‚ allowing corrections before drilling begins. These safety measures minimize the likelihood of human error and ensure precise‚ incident-free operations across various materials and applications.

How Laser Drill Guides Work

Laser drill guides project alignment patterns onto work surfaces‚ ensuring precise hole placement. They use laser technology to maintain accuracy and offer real-time feedback for adjustments‚ enhancing drilling efficiency and safety.

Alignment and Projection System

The alignment and projection system in laser drill guides uses a laser to project circular patterns onto the work surface‚ ensuring precise alignment of the drill bit. This system allows users to visually confirm when the drill is perpendicular to the material. The BullseyeBore Core‚ for example‚ projects concentric circles that align when the drill is straight‚ eliminating guesswork. The laser’s clarity and accuracy enable users to achieve professional-grade results‚ even in challenging orientations like walls or ceilings. This system is particularly useful for DIY enthusiasts and professionals alike‚ providing real-time visual feedback to ensure flawless drilling every time.

Laser Technology and Beam Accuracy

Laser Technology and Beam Accuracy

Laser drill guides employ advanced laser technology to project precise alignment patterns‚ ensuring drill bits strike the material accurately. The BullseyeBore Core‚ for instance‚ uses a laser to create concentric circles‚ confirming perpendicular alignment. This technology enhances beam accuracy‚ reducing errors and improving hole precision. The laser’s clarity and consistency enable users to drill straight holes effortlessly. Designed to work with various drill bits‚ the system ensures compatibility and reliability across different materials and projects. Its accuracy is maintained even in challenging orientations‚ making it a versatile tool for both professionals and DIY enthusiasts. The laser’s precision minimizes the risk of angled or misaligned holes‚ ensuring flawless results every time.

Real-Time Feedback and Adjustment

Laser drill guides provide real-time feedback through precise visual cues‚ enabling immediate adjustments. The BullseyeBore Core‚ for example‚ projects circular patterns that indicate alignment‚ allowing users to correct drill positioning instantly. This real-time system ensures perfect perpendicularity and reduces errors. The laser’s clarity offers continuous feedback‚ guiding users to adjust the drill angle or position as needed. This feature is particularly useful for DIYers and professionals‚ as it simplifies achieving accurate results. The ability to make on-the-fly adjustments enhances efficiency‚ ensuring projects are completed with precision and confidence. Real-time feedback is crucial for maintaining the high accuracy laser drill guides are known for.

Applications of Laser Drill Guides

Laser drill guides are versatile tools used in woodworking‚ metalworking‚ medical surgeries‚ and industrial applications‚ ensuring precise hole drilling in various materials and contexts with unmatched accuracy.

Woodworking and Carpentry

Woodworking and Carpentry

In woodworking and carpentry‚ laser drill guides are indispensable for achieving precise hole alignment and placement. They project clear visual cues‚ ensuring drill bits remain centered and aligned‚ which is critical for cabinetry‚ furniture making‚ and intricate wood designs. These tools eliminate guesswork‚ reducing errors and saving time. Professionals and DIYers alike benefit from the enhanced accuracy‚ particularly when working with expensive or delicate materials. The laser guide’s ability to maintain alignment without constant adjustments makes it a valuable asset for complex projects‚ ensuring flawless results and boosting overall productivity and satisfaction in woodworking tasks.

Metalworking and Industrial Uses

Metalworking and Industrial Uses

Laser drill guides are essential in metalworking for precision drilling in tough materials like steel‚ aluminum‚ and alloys. They ensure accurate hole placement‚ critical for machinery components‚ pipelines‚ and structural frameworks. Industrial applications benefit from their ability to handle thick materials and maintain alignment‚ reducing errors in high-stakes environments. The guides enhance productivity by minimizing rework and ensuring consistent results‚ making them indispensable for manufacturing and heavy-duty projects where precision is paramount. Their versatility across various metals and industrial scales solidifies their role in modern metalworking processes.

Medical and Surgical Applications

Laser drill guides play a crucial role in medical and surgical procedures‚ offering unparalleled precision for delicate tasks. Surgeons use these tools to drill accurate holes in bones‚ ensuring proper alignment for implants or screws. The guides minimize human error‚ enhancing surgical outcomes and patient safety. In dentistry‚ they assist in precise cavity preparations or root canal procedures. Their ability to maintain depth control and prevent over-drilling is vital in sensitive tissues. Medical applications benefit from the guides’ real-time feedback‚ allowing for adjustments during operations. This technology is indispensable in modern medicine‚ where accuracy and control are paramount for successful procedures and patient well-being.

Specialized Uses in Various Industries

Laser drill guides are increasingly adopted across diverse industries for their precision and adaptability. In aerospace‚ they enable accurate drilling of lightweight composite materials. Microelectronics manufacturing utilizes these guides for creating precise vias in circuit boards. Industrial automation integrates laser drill guides for high-precision hole drilling in complex geometries. Additionally‚ companies like SCANLAB and ESI employ advanced laser systems for micrometer-scale drilling in specialized applications. These tools also find niche uses in jewelry making and watch repair‚ where miniature‚ high-precision holes are required. Their versatility spans from industrial manufacturing to scientific research‚ making them indispensable in sectors demanding exacting standards and innovative solutions.

Choosing the Right Laser Drill Guide

Selecting the ideal laser drill guide involves considering compatibility‚ power source‚ build quality‚ and budget. Ensure it fits your drill and meets project requirements for optimal performance.

Factors to Consider for Compatibility

Factors to Consider for Compatibility

When selecting a laser drill guide‚ compatibility is crucial. Ensure the guide works with your drill type‚ whether handheld or drill press‚ and matches the chuck size. Check if it supports various drill bits‚ such as standard‚ hex shank‚ or spade bits. Verify its adaptability to different materials like wood‚ metal‚ or masonry. Additionally‚ consider the power source and battery life if applicable. Always consult the product’s compatibility guide to confirm it fits your specific drill model. Proper compatibility ensures seamless operation and optimal performance across your projects.

Power Source and Battery Life

Laser drill guides often require a reliable power source to function. Many models are battery-operated‚ offering portability and convenience. Battery life varies by product‚ with some lasting several hours on a single charge. Others may require external power sources‚ ensuring uninterrupted use. When choosing‚ consider how the power source aligns with your workflow—batteries for mobility or cords for consistent operation. Always check product specifications to understand power requirements and battery life. This ensures your laser guide remains operational throughout your projects‚ whether in a workshop or on-site. Proper power management is key to maintaining accuracy and efficiency.

Build Quality and Durability

Laser drill guides are designed with durability in mind‚ ensuring long-term performance. High-quality models feature robust materials resistant to wear and tear. The BullseyeBore Core‚ for instance‚ is built to withstand rigorous use while maintaining precision. Its durable design prevents scratching or marring of work surfaces‚ making it ideal for both professionals and DIY enthusiasts. Additionally‚ some laser guides include safety features like automatic disconnection if an obstruction is detected‚ further enhancing their longevity. A well-constructed laser drill guide not only provides accurate results but also withstands the demands of frequent use‚ ensuring reliable performance over time.

Budget and Value for Money

Laser drill guides offer exceptional value for their cost‚ enhancing accuracy without breaking the bank. Models like the BullseyeBore Core are affordable and compatible with a wide range of drills‚ making them a cost-effective solution for both professionals and DIYers. While prices vary‚ many laser guides provide long-term savings by reducing material waste and improving efficiency. Their durability and versatility across projects ensure they remain a worthwhile investment. With options available at various price points‚ users can find a laser drill guide that fits their budget while delivering professional-grade results‚ making them a practical choice for anyone looking to elevate their drilling precision.

Installation and Setup Guide

Installing a laser drill guide is quick and easy‚ typically involving mounting it to the drill press frame and aligning it with the drill bit. Standard tools are usually sufficient for setup‚ ensuring proper alignment and accuracy. Some models may require additional adjustments or power sources‚ but most are designed for straightforward installation to enhance drilling precision right away.

Mounting the Laser Guide on a Drill Press

Mounting the Laser Guide on a Drill Press

Mounting a laser guide on a drill press typically involves attaching it to the press frame using a clamp or bracket. The Wixey laser guide‚ for example‚ uses a secure clamp that installs with a standard flat blade screwdriver. Ensure the laser aligns with the drill bit for accurate operation. Some models‚ like the BullseyeBore Core‚ are designed to work with various drills and materials‚ offering flexibility and durability. Proper mounting ensures stability and precision‚ preventing misalignment and enhancing overall drilling performance. Always follow the manufacturer’s instructions for specific mounting requirements to achieve optimal results.

Aligning the Laser with the Drill Bit

Aligning the Laser with the Drill Bit

Aligning the laser guide with the drill bit is crucial for precise drilling. The laser projects a beam or pattern onto the workpiece‚ indicating where the drill bit will strike. Tools like the BullseyeBore Core use concentric circles to show alignment‚ ensuring the drill bit remains straight and perpendicular. Fine-tune the laser’s position by adjusting its mounting bracket or rotating the guide until the laser accurately reflects the drill bit’s path. Some models‚ such as the Wixey Drill Press Laser Guide‚ offer easy adjustment mechanisms for quick alignment. Proper alignment ensures accurate and consistent results‚ making the drilling process safer and more efficient.

Adjusting the Laser for Optimal Accuracy

Adjusting the Laser for Optimal Accuracy

Adjusting the laser guide for optimal accuracy ensures precise drilling results. Most laser drills‚ like the BullseyeBore Core‚ allow fine-tuning of the laser’s position and alignment. Calibration typically involves adjusting the mounting bracket or rotating the laser until the projected pattern aligns perfectly with the drill bit. Some models feature adjustable knobs or screws for precise alignment. Ensuring the laser is correctly calibrated prevents misalignment and enhances drilling consistency. Regular adjustments may be needed for different materials or drill bit sizes. Proper calibration ensures the laser guide functions effectively‚ delivering accurate and reliable results for various projects.

Troubleshooting Common Installation Issues

Troubleshooting Common Installation Issues

Common installation issues with laser drill guides often involve misalignment or improper mounting. Ensure the laser is securely fastened to the drill press frame and aligned with the drill bit. If the laser beam appears off-center‚ adjust the mounting bracket or calibration screws. Check for loose connections or batteries‚ as low power can affect accuracy. Misalignment may also occur if the drill press table isn’t level. Refer to the product manual for specific calibration steps. Troubleshooting these issues ensures optimal performance and precise drilling results‚ minimizing errors and enhancing overall efficiency for both DIY and professional projects.

Safety Guidelines and Precautions

Always wear protective eyewear when using laser drill guides to avoid exposure. Ensure proper alignment and secure mounting to prevent accidental starts. Follow manufacturer guidelines for safe operation.

Essential Safety Measures for Laser Use

When using a laser drill guide‚ always wear protective eyewear to prevent eye damage from direct laser exposure. Ensure the work area is clear of flammable materials and avoid loose clothing that could obstruct the laser beam. Properly align the laser guide before starting the drill to prevent misalignment errors. Keep children and pets away from the workspace. Follow the manufacturer’s instructions for power settings and never exceed recommended levels. Regularly inspect the laser guide for damage or misalignment. Disconnect the power source when not in use to prevent accidental activation. Always refer to the safety guidelines provided with the device for specific precautions.

Protecting Eyes and Skin from Laser Exposure

Direct exposure to laser beams can cause severe eye damage or skin burns. Always wear laser-specific safety goggles or glasses with appropriate optical density to block harmful wavelengths. Ensure the eyewear fits securely and provides side protection. For skin protection‚ avoid exposing bare skin to direct laser beams. Use protective clothing‚ such as long sleeves‚ to cover exposed areas. Never look directly at the laser beam or shine it near reflective surfaces. Keep bystanders away from the laser path. Follow manufacturer guidelines for safe exposure limits and maintain a safe distance from the laser source during operation.

Preventing Accidental Start-ups and Misalignment

To prevent accidental start-ups‚ ensure the laser drill guide is equipped with a safety switch or a secure activation mechanism. Always disconnect the power source when not in use. Regularly inspect the device for wear and tear‚ addressing any issues promptly. Properly align the laser with the drill bit before each use‚ using calibration tools if provided. Misalignment can lead to inaccurate drilling and potential damage. Follow the manufacturer’s alignment procedures meticulously and double-check the setup before initiating drilling. This ensures smooth operation and minimizes risks of errors or equipment malfunction during the drilling process.

Maintenance and Storage Tips

Maintenance and Storage Tips

Regularly clean the laser drill guide to ensure optimal performance‚ using a soft cloth to remove dust and debris. Store the device in a dry‚ cool place away from direct sunlight to prevent damage. Check for any wear or tear on the laser or mounting components and address issues promptly. After extended use‚ recalibrate the laser to maintain accuracy. For storage‚ disconnect any power sources and secure the device to prevent accidental activation. Use protective covers or cases to shield the laser and electronics from environmental factors. Proper maintenance ensures longevity and reliable operation of the laser drill guide.

Reviews and Testimonials

Users praise laser drill guides for their game-changing accuracy‚ with many calling them indispensable for both DIY and professional projects. Experts highlight their reliability and ease of use.

User Experiences with Laser Drill Guides

Users consistently praise laser drill guides for their ability to enhance drilling accuracy and simplify complex projects. Many DIY enthusiasts and professionals report significant improvements in hole alignment and reduced errors. The BullseyeBore Core‚ for instance‚ has been highlighted for its ease of use and versatility across various materials. Several reviewers mention how the tool eliminates the need for trial and error‚ saving time and materials. Additionally‚ the portability and compatibility with standard drills make it a favorite among woodworkers and metalworkers. Overall‚ user experiences underscore the tool’s effectiveness in delivering precise results for both beginners and seasoned craftsmen.

Expert Opinions and Recommendations

Expert Opinions and Recommendations

Experts highly recommend laser drill guides for their precision and ease of use. Professionals emphasize their value in woodworking‚ metalworking‚ and surgical applications‚ where accuracy is critical. Tools like the BullseyeBore Core are praised for their versatility and safety features‚ such as automatic disconnection upon obstruction. Companies like SCANLAB GmbH highlight their role in advanced laser drilling systems‚ showcasing their reliability in industrial settings. Many experts suggest investing in high-quality models for long-term durability and performance‚ ensuring consistent results across various materials and projects.

Comparison with Traditional Drill Guides

Comparison with Traditional Drill Guides

Laser drill guides offer significant advantages over traditional drill guides‚ which often rely on physical templates or blocks. Unlike conventional tools that can obstruct visibility and risk damaging surfaces‚ laser guides project precise alignment patterns without contact. They eliminate the need for repeated adjustments‚ providing real-time feedback for unmatched accuracy. Tools like the BullseyeBore Core are compact‚ versatile‚ and work in any orientation‚ making them far more convenient than traditional methods. This innovation enhances precision and reduces errors‚ making laser drill guides a superior choice for both professionals and DIY enthusiasts seeking consistent‚ professional-grade results.

Laser drill guides are transforming drilling accuracy‚ offering unparalleled precision and ease of use. Future advancements promise even greater versatility and efficiency‚ solidifying their role in modern toolkits.

Laser drill guides offer unmatched precision‚ ensuring straight and perfectly centered holes with minimal effort. By projecting clear alignment patterns‚ they eliminate guesswork and common drilling errors. These tools enhance efficiency in woodworking‚ metalworking‚ and medical applications‚ providing consistent results. Easy to install and use‚ laser guides are compatible with various drills and materials‚ making them versatile for professionals and DIYers. Safety features like automatic disconnection and real-time feedback further prevent accidents. Their ability to work in any orientation without obstructing the view or damaging surfaces makes them indispensable for modern toolkits‚ revolutionizing drilling tasks across industries.

Emerging Trends in Laser Drill Guide Technology

Emerging Trends in Laser Drill Guide Technology

Advancements in laser drill guide technology are driving precision and efficiency across industries. Integration with robotics and automation systems is becoming more prevalent‚ enabling high-speed‚ micrometer-level drilling. Femtosecond lasers are being adopted for delicate materials like glass‚ minimizing damage. Portable‚ battery-operated designs are gaining popularity for convenience. Real-time feedback systems are enhancing user control‚ while AI-driven alignment software improves accuracy. Compact‚ cost-effective solutions are emerging for industrial and medical applications‚ reducing production costs without compromising performance. These innovations ensure laser drill guides remain indispensable tools for modern manufacturing and craftsmanship‚ addressing diverse needs across sectors.

Final Thoughts and Recommendations

Laser drill guides have proven to be indispensable tools for enhancing accuracy and efficiency in drilling tasks. Whether for woodworking‚ metalworking‚ or industrial applications‚ these devices offer unparalleled precision and ease of use. When selecting a laser drill guide‚ consider compatibility with your drill‚ material versatility‚ and safety features. Tools like the BullseyeBore and Wixey Drill Press Laser Guide are highly recommended for their reliability and performance. Always prioritize safety by following proper usage guidelines and maintaining your equipment. By investing in a high-quality laser drill guide‚ you can achieve professional-grade results and streamline your workflow for years to come.

thelma the unicorn parents guide

Thelma the Unicorn is a heartwarming Netflix original about a singing pony who becomes a sparkly unicorn‚ exploring themes of fame‚ identity‚ and self-discovery.

1.1 Overview of the Movie

Thelma the Unicorn is a vibrant animated comedy about a singing pony named Thelma who gains fame after transforming into a sparkly unicorn. The film explores her journey through stardom‚ identity‚ and self-discovery‚ blending humor with heartfelt moments. With its colorful animation and catchy music‚ the movie appeals to children while offering themes that resonate with adults. Thelma’s adventure highlights the challenges of fame and the importance of staying true to oneself‚ making it an engaging and uplifting watch for families.

1.2 Target Audience

Thelma the Unicorn is primarily aimed at children‚ blending colorful animation and engaging storytelling. Its PG rating makes it suitable for kids‚ though parental discretion is advised due to mild humor. The film’s themes of self-discovery and friendship appeal to tweens and younger audiences‚ while its lighthearted tone ensures it’s enjoyable for families. Parents and caregivers are encouraged to watch alongside their children to guide discussions about the movie’s messages and humor.

1.3 Brief Plot Summary

Thelma the Unicorn follows a singing pony named Thelma who gains fame after transforming into a sparkly unicorn. She abandons her bandmates to pursue stardom but learns the challenges of celebrity life. The movie explores themes of identity‚ friendship‚ and staying true to oneself; With colorful animation and catchy music‚ it offers a fun yet meaningful story for young viewers‚ highlighting the importance of self-discovery and the downsides of fame;

Why Thelma the Unicorn is Rated PG

Thelma the Unicorn is rated PG for rude humor and mild mature themes‚ ensuring a balance of fun and appropriateness for younger audiences with parental guidance advised.

2.1 MPAA Rating Explanation

Thelma the Unicorn is rated PG by the MPAA primarily for its use of rude humor‚ which may not be suitable for all young children. The film contains mild thematic elements and comedic moments that could require parental discretion. While the overall tone is lighthearted‚ the presence of humor that may be considered inappropriate for younger audiences led to the PG rating. Parents are advised to review the content to ensure it aligns with their child’s sensitivity level.

2.2 Content Overview

Thelma the Unicorn features a blend of humor‚ adventure‚ and heartwarming moments‚ focusing on a pony’s journey to stardom and self-discovery. The film includes mild violence and comedic elements‚ with some scenes involving slapstick humor and playful banter. While the story promotes positive messages about friendship and embracing one’s true self‚ it also contains mild thematic elements and innuendos that may require parental discretion. The content is generally suitable for children but warrants guidance for younger viewers due to its PG rating;

Themes and Messages in Thelma the Unicorn

Thelma the Unicorn explores themes of self-discovery‚ friendship‚ and identity‚ highlighting the challenges of fame and staying true to oneself‚ offering uplifting messages for young audiences.

3.1 Themes of Self-Discovery

Thelma the Unicorn delves into themes of self-discovery‚ as the titular character navigates her transformation from a simple pony to a celebrated unicorn. This journey highlights her struggle to balance fame with her true identity‚ showcasing the importance of staying grounded despite external pressures. The film emphasizes personal growth and finding one’s voice‚ offering a relatable and inspiring message for young viewers about embracing their uniqueness and staying true to themselves.

3.2 Messages About Friendship

Thelma the Unicorn emphasizes the importance of friendship and loyalty‚ as Thelma faces challenges with her bandmates after gaining fame. The story highlights how true friends support each other through thick and thin‚ even when personal ambitions strain relationships. It teaches children the value of nurturing friendships and understanding that success is sweeter when shared with those who care. The film underscores that real friends stick together‚ offering a heartfelt message about the power of enduring bonds.

3.3 Exploration of Fame and Identity

Thelma the Unicorn delves into the complexities of fame and identity‚ as Thelma transforms from a humble pony to a celebrated unicorn. The film explores how sudden fame can alter self-perception and relationships‚ prompting Thelma to question her true self. It offers a poignant commentary on the pressures of stardom and the importance of staying grounded. The story encourages young viewers to reflect on their own values and identities‚ emphasizing that true worth comes from within‚ not external validation.

Violence and Scary Elements

The film contains mild violence and some scary elements‚ but they are not overly intense‚ making it suitable for children while warranting parental guidance for younger viewers.

4.1 Scenes of Mild Violence

Thelma the Unicorn includes scenes of mild violence‚ such as character conflicts and comedic mishaps‚ which may briefly capture a child’s attention. While not overly intense‚ these moments are balanced with positive messaging. The film’s PG rating reflects its suitability for younger audiences‚ though parental discretion is advised for sensitive children. Slapstick humor and lighthearted chaos are present‚ ensuring the violence remains non-threatening and appropriate for kids.

4.2 Potentially Frightening Moments

Thelma the Unicorn contains some scenes that may be intense for younger or sensitive viewers‚ such as unexpected events or emotional challenges. While not excessively scary‚ these moments could momentarily unsettle children. The PG rating reflects mild intensity‚ ensuring the content remains appropriate for most kids. Parents should be aware of these elements to gauge their child’s sensitivity. However‚ the frightful aspects are balanced with uplifting themes‚ keeping the film suitable for its intended audience.

Sexual Content and Innuendos

Thelma the Unicorn includes mild sexual innuendos‚ though they are subtle and not explicit. The content remains appropriate for children‚ with parental discretion advised for younger viewers.

5.1 Presence of Sexual Innuendos

The movie contains mild sexual innuendos‚ which are subtle and not overtly explicit. These moments are brief and integrated into the storyline without being the focus. While they are unlikely to be understood by young children‚ parents may want to be cautious depending on their child’s sensitivity and maturity level. The innuendos are not prominent but do contribute to the film’s PG rating‚ making it essential for parents to review the content before allowing younger viewers to watch.

5.2 Appropriate for Children?

Thelma the Unicorn is generally suitable for children‚ though parental discretion is advised due to mild sexual innuendos and rude humor. While the content is not overly explicit‚ younger or sensitive children may require guidance. The film’s themes of fame and identity are positive but may spark discussions about fame’s challenges. Overall‚ it is appropriate for kids aged 11 and above‚ making it a good choice for older children with parental oversight.

Language and Dialogue

Thelma the Unicorn features mild rude humor but avoids explicit language‚ making it suitable for children while maintaining a lighthearted tone balanced with positive messages.

6.1 Use of Rude Humor

The film incorporates mild rude humor‚ such as slapstick comedy and playful jokes‚ which are humorous yet not offensive‚ ensuring it remains appropriate for young audiences.

6.2 Appropriate Language for Kids

The dialogue in Thelma the Unicorn is generally suitable for children‚ avoiding harsh or inappropriate language. While some humor may appeal more to adults‚ it remains kid-friendly‚ making it a safe choice for family viewing.

Positive Messages and Role Models

Thelma the Unicorn promotes self-acceptance‚ kindness‚ and resilience‚ offering positive role models that inspire children to embrace their unique qualities and value true friendships.

7.1 Positive Role Models

Thelma‚ the singing pony‚ embodies resilience and kindness‚ showing children the importance of staying true to oneself. Her journey highlights empathy‚ self-acceptance‚ and the value of genuine friendships‚ making her a relatable and inspiring character for young audiences. The film encourages kids to embrace their uniqueness and supports positive behavioral growth through its uplifting narrative and strong moral compass.

7.2 Encouraging Positive Behavior

Thelma the Unicorn teaches valuable lessons about empathy‚ kindness‚ and self-acceptance. The film encourages children to embrace their uniqueness and understand the consequences of fame. By portraying Thelma’s journey‚ it highlights the importance of genuine friendships and staying true to oneself. These themes promote positive behavioral growth‚ making the movie a great tool for parents to discuss moral values and inspire kids to act with compassion and integrity in their daily lives.

Diversity and Representation

Thelma the Unicorn celebrates diverse characters‚ including LGBTQ+ representation‚ promoting inclusivity and normalizing different identities for young audiences.

8.1 LGBTQ+ Representation

Thelma the Unicorn incorporates LGBTQ+ characters‚ normalizing diverse relationships and identities. The film subtly yet meaningfully portrays these characters without stereotyping‚ offering positive representation.

This inclusive approach helps children understand and respect different perspectives‚ fostering an environment of acceptance and diversity from a young age.

8.2 Normalizing Diverse Characters

Thelma the Unicorn promotes diversity by showcasing a range of characters‚ emphasizing that uniqueness should not lead to exclusion. The film highlights how societal appearance-based judgments can overshadow talent‚ encouraging empathy and acceptance. By presenting diverse characters in relatable situations‚ it fosters understanding and inclusivity‚ helping children appreciate different perspectives and backgrounds. This normalization aids in breaking stereotypes‚ teaching kids the importance of valuing individuals for who they are.

Thelma the Unicorn for Older Kids

Thelma the Unicorn is a sparkly‚ fun film that older kids will enjoy‚ tackling themes of fame‚ friendship‚ and identity in a relatable way for tweens.

9.1 Suitability for Tweens

Thelma the Unicorn is a charming and engaging film that tweens can enjoy‚ offering themes of self-discovery‚ friendship‚ and handling fame. While it features humor and adventure‚ parents should be aware of mild rude humor and some mature themes. The movie’s message about staying true to oneself resonates well with older kids‚ making it a great choice for sparking conversations about identity and growth. Parental discretion is advised for sensitive children due to certain scenes and jokes.

9.2 Discussing Mature Themes

Parents should guide discussions about Thelma the Unicorn’s mature themes‚ such as fame’s pressures and identity struggles. The film touches on rude humor and mild violence‚ which may require context for younger viewers. Scenes involving transformation and fleeting unsettling moments could prompt conversations about self-acceptance and societal expectations. Encouraging critical thinking helps children process these themes healthily‚ fostering a deeper understanding of the story’s underlying messages and lessons.

Comparison with the Book

Thelma the Unicorn adapts core themes from its source material‚ focusing on self-discovery and friendship. While the movie expands on these ideas‚ specific differences aren’t detailed online.

10.1 Differences from the Source Material

While the movie adaptation of Thelma the Unicorn retains the core themes of self-discovery and friendship‚ specific differences from the book are not detailed online. The film expands on visual elements and character development‚ offering a unique interpretation of the story. However‚ the exact deviations from the source material remain unclear‚ as detailed comparisons are not provided in available reviews or summaries. Fans of the book may notice subtle changes in pacing or tone‚ but these are not explicitly highlighted.

10.2 Themes Shared with the Book

Both the movie and the book of Thelma the Unicorn emphasize themes of self-acceptance and overcoming prejudice. They explore how Thelma’s uniqueness is initially a source of exclusion but ultimately her strength. Friendship and loyalty are central‚ as Thelma navigates relationships and fame. The story highlights the importance of embracing diversity‚ a message resonating across both formats. These shared themes ensure the story’s heart remains consistent‚ making it a relatable and uplifting experience for audiences.

Educational Value

Thelma the Unicorn fosters creativity‚ empathy‚ and critical thinking in children. It encourages reflection on identity and friendship‚ while sparking meaningful discussions about fame and self-acceptance.

11;1 Learning Opportunities

Thelma the Unicorn offers rich learning opportunities‚ encouraging children to reflect on identity‚ empathy‚ and creativity. The film sparks discussions about fame‚ friendship‚ and self-acceptance‚ fostering critical thinking and emotional intelligence. Its themes of perseverance and kindness inspire young viewers to navigate challenges positively. Parents can use the story to teach moral lessons and promote open conversations about growing up and staying true to oneself.

11.2 Moral Lessons

Thelma the Unicorn delivers moral lessons about staying true to oneself and the importance of friendship. The film teaches children the value of humility and balancing fame with personal values. Through Thelma’s journey‚ kids learn that true success comes from within and that kindness and authenticity are essential. These lessons help guide children in making positive choices and understanding the consequences of their actions‚ fostering a strong moral foundation.

Helping Children Understand the Story

Parents can guide discussions about Thelma’s journey‚ encouraging kids to reflect on her choices and the consequences of fame‚ fostering critical thinking and emotional understanding.

12.1 Guiding Discussions

Guiding discussions about Thelma the Unicorn involves asking open-ended questions to explore themes like fame‚ identity‚ and self-discovery. Parents can encourage kids to reflect on Thelma’s transformation and the consequences of her choices. Discussing how Thelma navigates fame while staying true to herself helps children understand the importance of authenticity. Additionally‚ parents can highlight moments where Thelma learns from her mistakes‚ fostering a conversation about resilience and personal growth. This approach helps children connect with the story on a deeper level and think critically about the themes presented.

12.2 Encouraging Critical Thinking

Encourage critical thinking by discussing Thelma’s decisions and their consequences. Ask children to analyze how fame affected her relationships and identity. Explore whether her choices were wise and how they reflect real-life dilemmas. Discuss scenes where Thelma faces moral challenges‚ prompting kids to think about what they would do differently. This helps develop analytical skills and encourages children to evaluate the pros and cons of Thelma’s actions‚ fostering a deeper understanding of the story’s themes and their relevance to everyday life.

Addressing Controversies

Thelma the Unicorn addresses controversies surrounding its content‚ sparking debates on its suitability for young audiences and the balance between creative freedom and family values.

13.1 Parental Concerns

Parents have expressed concerns over Thelma the Unicorn’s content‚ particularly its rude humor and suggestive elements. Scenes like men wearing dance belts and Thelma’s transformation have raised eyebrows. While the film promotes self-discovery and friendship‚ its mature themes and innuendos may not suit all younger audiences. Some worry about normalizing LGBTQ+ behaviors‚ sparking debates on its suitability for children. Parents are advised to review the content to ensure it aligns with their child’s sensitivity and values.

13.2 Balancing Perspectives

While some parents worry about Thelma the Unicorn’s mature themes‚ others appreciate its positive messages on self-acceptance and diversity. The film sparks conversations about identity and inclusivity‚ encouraging critical thinking in children. By addressing both concerns and praise‚ parents can help kids understand the story’s nuances‚ fostering an open dialogue about its content and themes. This balanced approach ensures children grasp the film’s lessons while staying mindful of its potential sensitivities.

Reviews and Ratings

Thelma the Unicorn has mixed reviews‚ with parents praising its positive messages but noting concerns over mature themes. Common Sense Media rates it for ages 11+‚ highlighting its humor and heartwarming story‚ while Kids-In-Mind.com points out mild violence and rude humor. Overall‚ it’s deemed suitable for older kids with parental guidance.

14.1 Parent Reviews

Parents praise Thelma the Unicorn for its positive messages and creativity‚ though some note concerns over mature themes. Common Sense Media highlights its heartwarming story‚ while others mention mild violence and rude humor. Many agree it’s suitable for older kids‚ with guidance recommended. The film’s colorful animation and uplifting tone resonate well‚ making it a enjoyable watch for families with tweens. Overall‚ parents find it a charming yet cautionary tale about fame and identity.

14.2 Critical Reception

Thelma the Unicorn has received generally positive reviews from critics‚ praised for its vibrant animation and heartfelt story. While some critics note its predictable plot‚ many highlight its engaging themes of self-discovery and fame. The film’s PG rating aligns with its mild humor and suitability for older children. Critics commend its ability to balance lighthearted fun with meaningful messages‚ making it a charming addition to family-friendly entertainment;

Safety Tips for Watching Online

Ensure safe viewing by using parental controls‚ monitoring content‚ and supervising children during streams. Check age ratings and use filters to block inappropriate material.

15.1 Ensuring Safe Viewing

Parents should enable parental controls on streaming platforms to restrict access to mature content. Regularly monitor what your child watches and discuss any inappropriate scenes. Using kid-friendly profiles and setting content filters can help block unsuitable material. Additionally‚ checking reviews and age ratings beforehand ensures Thelma the Unicorn aligns with your child’s sensitivity levels. Supervised viewing fosters a safer and more controlled environment for young viewers to enjoy the movie responsibly.

15.2 Monitoring Content

Regularly review the content your child consumes to ensure it aligns with their maturity level. For Thelma the Unicorn‚ check for scenes involving mild violence or suggestive humor. Utilize parental control software to track viewing habits and block inappropriate material. Encourage open conversations with your child about the themes and messages in the movie. This proactive approach helps create a safe and informed viewing experience‚ fostering trust and understanding between parents and children.

Thelma the Unicorn offers a charming story with valuable lessons‚ but parental discretion is advised due to mild humor and themes. A balanced approach ensures a enjoyable experience for all ages while fostering meaningful discussions about its content and messages.

16.1 Final Thoughts

16.2 Overall Recommendation

We recommend Thelma the Unicorn for its positive messages and engaging storyline‚ suitable for children aged 8 and above. Parents should watch with younger kids to address any mature themes. The film’s humor and heartwarming moments make it a great choice for family movie nights‚ encouraging discussions on self-discovery and friendship. With guidance‚ it offers a valuable viewing experience for both children and adults alike.

davis drug guide 18th edition pdf

The Davis Drug Guide 18th Edition, authored by April Hazard Vallerand and Cynthia A. Sanoski, is a comprehensive resource for nurses, offering updated medication information and safety guidelines. Published by F.A. Davis, this edition emphasizes vulnerable populations, pharmacogenomics, and enhanced medication safety tools, making it an essential tool for clinical decision-making and patient care.

Overview of the Davis Drug Guide

The Davis Drug Guide is a trusted nursing resource providing comprehensive drug information. The 18th edition, authored by April Hazard Vallerand and Cynthia A. Sanoski, is organized by body systems, with over 1,000 monographs covering generic and trade drugs. It features 50 therapeutic classifications, including 27 starting with the ANIT- prefix. The guide emphasizes safe administration, contraindications, and side effects, with special focus on vulnerable populations like children, the elderly, and pregnant women. Updated pharmacogenomic data helps tailor therapies, while appendices offer quick access to critical information. This guide is a cornerstone for nursing practice, blending practicality with evidence-based care.

Importance of the 18th Edition

The 18th edition of the Davis Drug Guide is a critical update for nurses, offering enhanced medication safety tools and expanded information for vulnerable populations, including children, the elderly, and pregnant women. New pharmacogenomic data aids in personalized therapy selection. The guide includes 50 therapeutic drug classifications, with 27 starting with the ANIT- prefix, ensuring clarity in treatment purposes. With a focus on safe administration and preventing errors, this edition is indispensable for nursing practice, providing up-to-date, evidence-based information to improve patient care and outcomes.

Key Features of the 18th Edition

The Davis Drug Guide 18th Edition features updated medication information, new safety tools, expanded pharmacogenomic data, and detailed therapeutic classifications, ensuring comprehensive and evidence-based nursing practice support.

New Additions and Updates

The 18th Edition introduces enhanced medication safety tools and expanded information for vulnerable populations, including children, the elderly, and pregnant women. New pharmacogenomic details guide personalized therapy, ensuring safer and more effective treatment. Updates include the latest drug classifications, interaction alerts, and nursing implications, reflecting current clinical practices. This edition also strengthens its focus on patient safety with revised monographs and appendices, providing nurses with critical insights for administering medications across the lifespan. These updates ensure the guide remains a trusted, evidence-based resource for nursing professionals.

Enhanced Focus on Medication Safety

The 18th Edition prioritizes medication safety with detailed alerts for life-threatening side effects and contraindications. Drugs with high-risk potential are highlighted in bold, ensuring nurses can quickly identify critical information. The guide emphasizes safe administration practices, particularly for IV medications, with dedicated sections on preventing errors. Appendices provide rapid access to essential safety data, such as immunization guidelines and pharmacokinetic details. This enhanced focus equips nurses with the tools to minimize risks and deliver safer patient care across all settings and populations.

Expanded Information for Vulnerable Populations

The 18th Edition of the Davis Drug Guide includes expanded content for vulnerable populations, such as pediatric, geriatric, pregnant, and breastfeeding patients. Detailed dosage adjustments and safety considerations are provided to address the unique needs of these groups. Pharmacogenomic information is integrated throughout drug monographs, helping nurses tailor therapies to individual patient factors. This comprehensive approach ensures nurses can administer medications safely and effectively, meeting the diverse needs of their patients while minimizing potential risks associated with medication use in sensitive populations.

Drug Classification System

Davis Drug Guide uses therapeutic classifications, organizing drugs by use. With 50 classifications, 27 start with “ANIT-,” grouping drugs by specific conditions, aiding nurses in identifying medications efficiently.

Therapeutic Classification of Drugs

The 18th Edition of the Davis Drug Guide organizes medications into 50 therapeutic classifications, focusing on their clinical use. Drugs are grouped by their primary therapeutic purpose, with 27 classifications starting with the “ANIT-” prefix, addressing specific conditions. This system helps nurses quickly identify medications for particular treatments. For example, opioid analgesics and NSAIDs are classified separately due to differences in mechanisms or uses. Such organization enhances clinical decision-making, allowing nurses to efficiently locate and administer appropriate medications, ensuring safe and effective patient care.

Davis IDs and Drug Groupings

Davis IDs are unique identifiers used to group drugs by their therapeutic use, simplifying navigation. The guide features 50 drug classifications, with 27 starting with the “ANIT-” prefix, targeting specific conditions. The remaining 23 classifications do not use this prefix, often due to multiple uses, different mechanisms, or unique sources. For example, opioid and nonopioid analgesics are separated despite similar pain-relief purposes. This system ensures drugs with shared therapeutic goals are clustered, aiding nurses in quickly identifying appropriate medications and enhancing clinical decision-making. Such organization streamlines access to critical drug information, supporting safe and effective patient care practices.

Examples of Drug Classifications

The Davis Drug Guide categorizes medications into 50 therapeutic classes, such as opioid analgesics for pain relief and NSAIDs for inflammation. These classifications help nurses quickly identify medications by their primary use. For instance, anticoagulants and thrombolytics are grouped for cardiovascular care, while corticosteroids and antihistamines are classified for immune-related conditions. This logical grouping aids in understanding drug mechanisms and safety profiles, ensuring tailored patient care. Examples include opioid analgesics, nonsteroidal anti-inflammatory drugs (NSAIDs), anticoagulants, and antiplatelet agents, each with specific uses and safety considerations, facilitating efficient clinical decision-making and safe medication administration. This clear organization enhances nursing practice and patient outcomes.

Organization and Structure

The Davis Drug Guide is structured by body systems, with detailed monographs and appendices for quick reference, enhancing navigation and accessibility for healthcare professionals.

Body System Organization

The 18th Edition of the Davis Drug Guide is organized by body systems, making it intuitive for healthcare professionals to locate drug information based on patient conditions. Each section focuses on specific anatomical systems, such as cardiovascular or respiratory, ensuring a logical flow of content. This structure aligns with clinical practice, where medications are often prescribed to target specific physiological systems. The guide also includes therapeutic classifications, appendices, and an index to help users quickly find medications by generic or brand names. This systematic approach enhances accessibility and efficiency, particularly in high-pressure clinical environments, while also aiding nursing students in their educational journey.

Drug Monographs and Appendices

The 18th Edition of the Davis Drug Guide features comprehensive drug monographs, each detailing dosage, side effects, interactions, and nursing implications. These monographs are organized to prioritize patient safety and clinical relevance, with bold headings and capitalization for brand names. The guide also includes 16 appendices, offering quick reference information on topics like pharmacokinetics, herbal products, and medication safety. Appendices such as “Insulins and Insulin Therapy” and “Pharmacogenomic Information” provide specialized insights, while the index aids in locating drugs by generic or brand names. This structure ensures nurses can efficiently access critical information, supporting both clinical decision-making and education. Appendices enhance usability, making the guide a versatile tool for daily practice.

Navigating the Guide Efficiently

The 18th Edition of the Davis Drug Guide is organized by body systems, making it easy to locate information quickly. The index at the back provides page numbers for both generic and brand-name drugs, while appendices offer rapid access to specialized topics. Bold headings and capitalization for brand names enhance readability. The main content is clearly marked on the upper edges of each page, allowing nurses to navigate seamlessly. These features ensure that critical drug information, including dosages, side effects, and interactions, can be found efficiently, supporting nurses in making informed clinical decisions and managing daily tasks effectively.

Medication Safety and Administration

The 18th Edition emphasizes safe medication practices, highlighting life-threatening side effects and organizing drugs by body systems for quick reference. Rights of administration are prioritized, ensuring accuracy and safety.

Safe Medication Administration Practices

The 18th Edition of the Davis Drug Guide emphasizes safe medication administration by prioritizing the “rights” of medication administration: right patient, drug, dose, route, time, and documentation. It highlights life-threatening side effects and lists the most frequent adverse effects, organized by body systems for quick reference. The guide also includes special considerations for IV medications, requiring diligent attention to administration rights and safety protocols. These practices ensure nurses can administer medications accurately and safely, minimizing errors and enhancing patient care outcomes.

Recognizing and Preventing Errors

The 18th Edition of the Davis Drug Guide provides clear strategies for recognizing and preventing medication errors. It highlights life-threatening side effects and drug interactions, while also offering practical tips for avoiding common mistakes; The guide emphasizes the importance of double-checking dosages, verifying drug classifications, and understanding contraindications. Special considerations for high-risk medications, such as IV drugs, are included to enhance safety. By organizing information by body systems and providing quick-reference appendices, the guide equips nurses with the tools to identify potential errors and implement preventive measures, ensuring safer patient care.

Special Considerations for IV Medications

The 18th Edition of the Davis Drug Guide emphasizes safe administration of IV medications, requiring diligent attention to the rights of medication administration. It highlights the importance of verifying dosages, ensuring proper dilution, and using compatible IV solutions. The guide also stresses monitoring for infusion-related reactions and adhering to specific administration rates. Special considerations include patient-specific factors, such as renal function and fluid status, to prevent complications. By providing detailed protocols and safety tips, the guide helps nurses deliver IV medications accurately and safely, minimizing risks and improving patient outcomes.

Drug Interactions and Contraindications

The 18th Edition provides detailed insights into drug interactions, contraindications, and adverse effects, emphasizing mechanisms and risks. It covers anticoagulants, antiplatelet agents, and opioid analgesics, ensuring safe administration and minimizing complications.

Understanding Drug Interactions

The Davis Drug Guide 18th Edition provides a detailed overview of drug interactions, explaining how medications can interfere with each other, food, or natural products. It highlights potential risks, such as increased side effects or reduced efficacy, and offers practical insights for nurses to identify and manage these interactions. The guide categorizes drugs based on their therapeutic use and mechanisms, helping nurses anticipate and mitigate complications. Special attention is given to high-risk interactions, such as those involving anticoagulants, antiplatelet agents, and opioid analgesics, ensuring safer patient outcomes through informed clinical decisions.

Contraindications and Precautions

The Davis Drug Guide 18th Edition thoroughly outlines contraindications and precautions for medications, ensuring safe administration. It identifies conditions under which drugs should not be used, such as allergies or specific diagnoses, and highlights situations requiring cautious use due to potential risks. The guide emphasizes universal contraindications, like allergies, and provides detailed precautions for vulnerable populations, including children, the elderly, and pregnant or breastfeeding women. By addressing these critical factors, the guide helps nurses make informed decisions to avoid adverse outcomes and optimize patient safety.

Adverse Effects and Side Effects

The Davis Drug Guide 18th Edition provides detailed information on adverse effects and side effects, organized by body system for easy access. It categorizes side effects into life-threatening and most frequent occurrences, helping nurses prioritize patient care. The guide also addresses potential drug interactions with other medications, food, and natural products, which can lead to adverse outcomes. With an increased focus on pharmacogenomics, it aids in tailoring drug therapies to individual genetic profiles, minimizing harmful side effects and enhancing patient safety. This comprehensive approach ensures nurses can quickly identify and manage adverse reactions, improving overall care quality.

Patient-Specific Considerations

The 18th Edition provides comprehensive information on pediatric and geriatric dosage adjustments, considerations for pregnant and breastfeeding women, and pharmacogenomic insights to tailor drug therapies for individual needs safely and effectively.

Pediatric and Geriatric Dosage Adjustments

The 18th Edition of the Davis Drug Guide provides detailed guidance on dosage adjustments for pediatric and geriatric patients, ensuring safe and effective medication administration. It addresses age-related physiological changes, such as renal and hepatic function, that impact drug metabolism. Specific considerations for children include weight-based dosing and developmental stages, while elderly patients require attention to comorbidities and polypharmacy risks. The guide offers clear, evidence-based recommendations to optimize therapy in these vulnerable populations, helping nurses tailor care to individual patient needs and minimize adverse effects. This section is crucial for nurses working with diverse patient groups, emphasizing safety and personalized care.

Considerations for Pregnant and Breastfeeding Women

The 18th Edition of the Davis Drug Guide emphasizes safe medication use during pregnancy and lactation, providing critical information to guide nurses in these sensitive populations. It includes fetal risk categories, dosage adjustments, and potential effects on the fetus or infant. The guide highlights medications contraindicated during pregnancy and those safe for breastfeeding, ensuring informed decision-making. Nurses can rely on evidence-based recommendations to balance therapeutic benefits and risks, optimizing care for pregnant and breastfeeding women while protecting their infants from potential harm. This section is vital for promoting maternal and neonatal health and safety.

Pharmacogenomic Information

The 18th Edition of the Davis Drug Guide incorporates expanded pharmacogenomic information, helping nurses tailor drug therapies to individual genetic profiles. This section provides insights into how genetic variations influence drug responses, enabling personalized care. Nurses can access specific guidance on selecting and monitoring medications based on pharmacogenomic factors, enhancing treatment efficacy and minimizing adverse effects. This enhanced focus ensures that genetic considerations are integrated into clinical decision-making, making the guide a valuable resource for nurses striving to deliver precision-based patient care in diverse clinical settings.

Digital and Print Formats

The 18th Edition of the Davis Drug Guide is available in both digital and print formats, offering flexibility for nurses. The digital version provides portability and accessibility, while the print edition remains a reliable bedside reference, catering to diverse learning preferences and clinical needs.

Benefits of the Digital Edition

The digital edition of the Davis Drug Guide 18th Edition offers unparalleled convenience and accessibility. It is available on multiple platforms, including iOS, Android, and web, allowing nurses to access critical drug information anywhere. The eTextbook format enables easy searches, bookmarking, and highlighting, enhancing study and clinical efficiency. Regular updates ensure that the content remains current with the latest medication guidelines and safety alerts. Additionally, the digital version is more cost-effective, with options to save up to 80% compared to the print edition, making it a practical choice for students and professionals alike.

Accessibility and Portability

The digital version of the Davis Drug Guide 18th Edition excels in accessibility and portability, catering to diverse learning needs. It is compatible with iOS, Android, and web platforms, ensuring seamless access on smartphones, tablets, and computers. The guide is easily navigable, with features like search, bookmarking, and highlighting, which facilitate quick reference. Its lightweight digital format allows nurses to carry comprehensive drug information anywhere, making it an indispensable tool for both clinical practice and education. This portability ensures that critical medication details are always within reach, enhancing efficiency and decision-making in dynamic healthcare settings.

Comparing Print and Digital Versions

The 18th Edition of the Davis Drug Guide is available in both print and digital formats, each offering unique advantages. The print version provides a tangible, easy-to-flip-through reference, ideal for hands-on learning and quick access in clinical settings. In contrast, the digital edition delivers enhanced portability and search functionality, allowing users to instantly locate information on any device. While the print version is preferred for its tactile experience, the digital format offers cost savings of up to 80% and regular updates, ensuring users always have the most current drug information. Both versions complement each other, catering to different learning and clinical preferences.

Practical Applications for Nurses

The Davis Drug Guide 18th Edition equips nurses with essential tools for clinical decision-making, featuring detailed monographs, nursing implications, and safety tips. Its organized format ensures quick access to critical drug information, enabling nurses to administer medications safely and effectively across various patient populations.

Using the Guide for Clinical Decision-Making

The Davis Drug Guide 18th Edition is invaluable for nurses in clinical decision-making, offering comprehensive monographs organized by body systems. Each entry includes dosage, side effects, interactions, and nursing implications, enabling nurses to quickly assess and address patient needs. The guide’s focus on medication safety, pharmacogenomics, and vulnerable populations ensures informed care. With clear, evidence-based information, nurses can confidently guide patients through treatment plans, minimizing risks and optimizing outcomes. Its practical format and detailed appendices further support accurate and efficient decision-making in dynamic healthcare settings.

Nursing Implications and Tips

The Davis Drug Guide 18th Edition provides detailed nursing implications and practical tips, ensuring safe and effective medication administration. Nurses can quickly access information on dosage adjustments, potential side effects, and monitoring parameters. The guide emphasizes patient-specific considerations, such as pediatric and geriatric care, and offers insights for pregnant and breastfeeding women. Tips on recognizing and preventing medication errors, along with pharmacogenomic guidance, empower nurses to tailor treatments. The guide’s clear, nursing-focused monographs and appendices make it an indispensable resource for delivering high-quality, patient-centered care in diverse clinical settings.

Integrating the Guide into Daily Practice

The Davis Drug Guide 18th Edition is designed to seamlessly integrate into nurses’ daily workflows, offering practical tools for medication management. Its portable format and digital accessibility ensure nurses can quickly reference critical information at the bedside. The guide’s body system organization and comprehensive appendices simplify navigation, while medication safety tools and pharmacogenomic insights support informed decision-making. Nurses can apply the guide’s nursing implications and tips to enhance patient care, making it an indispensable resource for improving efficiency and accuracy in clinical practice. Regular updates and evidence-based content further solidify its role as a trusted companion for nurses.

Additional Resources and Appendices

The 18th Edition includes 16 appendices, offering quick access to essential information like insulins, medication errors, and pharmacokinetics. Digital supplements and an app enhance accessibility and usability for nurses.

Appendices for Quick Reference

The 18th Edition features 16 appendices, providing rapid access to critical information such as insulins, immunizations, and pharmacokinetic data. These sections are designed to support nurses in clinical decision-making, offering concise details on medication administration, safety, and patient-specific considerations. Appendices also cover natural/herbal products and high-alert medications, ensuring nurses can quickly locate essential information. Digital versions enhance accessibility, allowing users to navigate seamlessly between appendices and drug monographs. This robust collection of supplementary materials makes the guide an indispensable resource for both student nurses and experienced professionals.

Supplemental Materials for Education

The Davis Drug Guide 18th Edition offers extensive educational resources, including flashcards, online quizzes, and case studies. These tools aid nurses in mastering pharmacology, with a focus on drug classifications and safety. The guide’s digital version provides interactive features, enhancing learning and retention. Additionally, instructor resources support curriculum integration, making it a valuable asset for nursing education. These materials ensure that nurses can apply knowledge effectively in clinical settings, staying updated on best practices and guidelines. The educational supplements complement the core content, fostering a deeper understanding of medication therapy and patient care.

The Davis Drug Guide 18th Edition is a cornerstone for nursing practice, offering comprehensive, updated drug information and safety-focused tools. Its user-friendly design and educational resources make it indispensable for both students and professionals, ensuring safe and effective medication administration. This edition underscores a commitment to advancing nursing knowledge and patient care, solidifying its role as a trusted resource in the ever-evolving healthcare landscape.

Final Thoughts on the 18th Edition

The Davis Drug Guide 18th Edition remains a cornerstone for nursing practice, delivering comprehensive, evidence-based information tailored to clinical needs. With a strong focus on medication safety, expanded pharmacogenomic insights, and enhanced accessibility, this edition is indispensable for nurses. Its well-organized monographs and extensive appendices provide quick access to critical drug data, ensuring safe and effective patient care. As a trusted resource, it continues to empower nurses with the knowledge and tools needed to navigate the complexities of modern pharmacotherapy, solidifying its reputation as a must-have guide for both students and professionals in the field.

Future of the Davis Drug Guide

The Davis Drug Guide is poised to remain a leading resource in nursing pharmacotherapy, with future editions expected to integrate more advanced digital features and AI-driven updates. As medication science evolves, the guide will likely expand its focus on pharmacogenomics, personalized medicine, and rare diseases. Enhanced accessibility through mobile apps and real-time updates will further empower nurses. By adapting to emerging healthcare challenges, the Davis Drug Guide will continue to bridge the gap between clinical knowledge and practical application, ensuring it remains an indispensable tool for future generations of nurses and healthcare professionals.

pioneer fh x720bt installation guide

The Pioneer FH-X720BT is a high-quality car stereo designed to enhance your in-car entertainment experience. It features Bluetooth connectivity, USB support, and a sleek, user-friendly interface.

1.1 Overview of Pioneer FH-X720BT Features

The Pioneer FH-X720BT is a 2-DIN car stereo that combines modern technology with intuitive controls. It features Bluetooth connectivity for hands-free calling and wireless music streaming, along with USB and auxiliary inputs for versatile media playback. The unit supports iPod/iPhone integration, allowing seamless connectivity to Apple devices. It also includes a multi-color illumination system, enabling customizable display options to match your vehicle’s interior. The stereo delivers high-quality audio with a nominal power output of 4×22 Watts and a peak output of 4×50 Watts. Additional features like CD-R/CD-RW compatibility and a sleek, responsive interface make it a comprehensive solution for in-car entertainment.

1.2 Importance of Proper Installation

Proper installation of the Pioneer FH-X720BT is crucial to ensure optimal performance, safety, and longevity of the unit. Incorrect wiring or mounting can lead to damage to the stereo, your vehicle’s electrical system, or even pose safety risks. Following the installation manual carefully helps prevent these issues and guarantees that all features function as intended. Additionally, proper installation ensures a secure fit, minimizing the risk of theft or tampering. It also maintains the warranty, as improper installation may void it. Taking the time to install the unit correctly allows you to enjoy a seamless and trouble-free entertainment experience in your vehicle.

Pre-Installation Steps

Gather tools, review the manual, and prepare your vehicle. Disconnect the battery, ensure all components are ready, and plan the installation layout for a smooth process.

2;1 Gathering Necessary Tools and Materials

To ensure a smooth installation, gather all required tools and materials beforehand. These include a screwdriver set, wiring harness adapter, dash removal tools, and electrical connectors. Additionally, you’ll need a mounting kit, USB and Bluetooth adapters, and any vehicle-specific accessories. Don’t forget extra wire, electrical tape, and heat shrink tubing for secure connections. Refer to the installation manual for a detailed list tailored to your Pioneer FH-X720BT and vehicle. Organize these items to save time and avoid delays during the process. Proper preparation ensures a professional-grade installation and minimizes the risk of errors or damage to your car or stereo system.

2.2 Understanding the Installation Manual

Before starting, thoroughly review the Pioneer FH-X720BT installation manual to understand the process. The manual provides detailed instructions, wiring diagrams, and safety precautions. It outlines compatible tools and materials, ensuring a smooth setup. Familiarize yourself with the unit’s dimensions, mounting requirements, and electrical specifications. Pay attention to step-by-step guides for removing the old stereo, connecting wires, and securing the new unit. Troubleshooting tips are also included to address common issues. The manual is available in multiple languages and formats, such as PDF, for easy reference. Reading it carefully will help you avoid errors and ensure a professional-grade installation tailored to your vehicle and stereo system.

2.3 Preparing the Vehicle for Installation

Before installing the Pioneer FH-X720BT, ensure your vehicle is properly prepared; Disconnect the negative battery terminal to prevent electrical shocks or damage. Remove any trim panels or dashes to access the existing stereo system. Use a screwdriver to carefully take out the old unit, and label the wires for easy identification. Clean the dashboard area to ensure a smooth mounting process. Check the vehicle’s compatibility with the Pioneer FH-X720BT’s dimensions to confirm a proper fit. If necessary, consult your vehicle’s manual for specific instructions on accessing the stereo compartment. Proper preparation ensures a safe and efficient installation process.

Installation Process

The Pioneer FH-X720BT installation involves mounting the unit, connecting the wiring harness, and securing it in the dashboard. Ensure proper connections and test all features for functionality.

3.1 Removing the Old Car Stereo

Begin by disconnecting the car battery to ensure safety. Next, remove the trim or dashboard components surrounding the old stereo to access it. Gently pull the unit outward, taking care not to damage any wiring. Remove the screws securing the stereo in place, then carefully disconnect the wiring harness, antennae, and any other connected accessories. If the stereo is stuck, use a removal tool to pry it out without causing damage. Once removed, set the old unit aside and prepare the area for the new Pioneer FH-X720BT installation. Always refer to the installation manual for specific instructions tailored to your vehicle model.

3.2 Mounting the Pioneer FH-X720BT

Mounting the Pioneer FH-X720BT begins by ensuring the dashboard opening matches the unit’s 2-DIN standard size. Use the provided mounting kit to secure the stereo. Attach the brackets to the unit using the supplied screws, ensuring proper alignment for controls and screen visibility. Carefully slide the unit into the dashboard slot, avoiding excessive force to prevent damage. Secure the unit with screws provided, tightening gently to prevent rattling. Refer to the manual for specific instructions and wiring connections; After mounting, test the unit to ensure functionality and adjust as needed for optimal performance and appearance.

3.3 Connecting the Wiring Harness

Connecting the wiring harness is a critical step in the installation process. Begin by identifying the wires in the Pioneer FH-X720BT harness and matching them to your vehicle’s wiring. Use the provided wiring diagram to ensure correct connections. Connect the battery wire (usually red) to the vehicle’s constant power source and the ground wire (black) to a metallic part of the dashboard. Attach the ignition wire (yellow) to the vehicle’s ignition circuit. Connect the speaker wires to the appropriate channels, ensuring proper polarity. Finally, link any accessory wires, such as Bluetooth or USB connectors, to their respective terminals. Double-check all connections for accuracy and test the system to ensure functionality.

3.4 Installing the Unit in the Dashboard

Once the wiring is connected, carefully insert the Pioneer FH-X720BT into the dashboard opening. Ensure the unit is aligned properly with the mounting brackets. Secure the stereo using the provided screws or clips, tightening them firmly but avoiding over-tightening. Use the dashboard trim panel to cover the installation, ensuring a seamless fit. Reconnect any previously removed accessories, such as air vents or control panels. Test the unit to confirm all functions work correctly. If necessary, adjust the unit’s position for proper fitment. Refer to the installation manual for specific instructions tailored to your vehicle’s dashboard configuration. Proper installation ensures both functionality and aesthetic appeal.

3.5 Connecting Accessories (Bluetooth, USB, etc.)

After installing the unit, connect the Pioneer FH-X720BT to your preferred accessories. For Bluetooth pairing, enable Bluetooth on your device and select the Pioneer stereo from the available options. Follow the on-screen instructions to complete the pairing process. For USB connectivity, insert your USB device into the designated port. The stereo will automatically detect and play media from the device. Ensure all connections are secure to avoid signal loss. If using additional features like voice commands or app integration, refer to the Pioneer Smart Sync guide for setup instructions. Properly connecting these accessories enhances your overall listening experience and ensures seamless functionality.

Initial Setup and Configuration

Configure the Pioneer FH-X720BT by setting up the display, illumination, and audio preferences, ensuring optimal performance and personalization for an enhanced driving experience.

4.1 Powering On the Unit for the First Time

After completing the installation, power on the Pioneer FH-X720BT by turning the ignition switch to the “ON” position. The unit will automatically light up, displaying the initial setup screen. Ensure all connections, including the battery and accessory wires, are secure for proper functionality; The display will guide you through basic settings like time, date, and brightness. Familiarize yourself with the interface and adjust settings as needed. Proper power-up ensures the system is ready for Bluetooth pairing, audio playback, and other advanced features. Always refer to the installation manual for specific instructions to avoid errors during the initial setup process.

4.2 Setting Up the Display and Illumination

To customize the display and illumination of your Pioneer FH-X720BT, navigate to the settings menu. Adjust the brightness and color scheme to match your preferences. The multi-color illumination feature allows you to choose from various vibrant colors to enhance your car’s interior. Synchronize the display’s illumination with your music for a dynamic visual experience. Ensure the display is set to the correct time and date for optimal functionality. Use the manual’s guidance to explore advanced display options, such as dimming settings for nighttime driving. Proper customization ensures a seamless and visually appealing user experience while maintaining safety and convenience on the road.

4.3 Pairing Bluetooth Devices

To pair a Bluetooth device with the Pioneer FH-X720BT, ensure the unit is turned on and in Bluetooth mode. Navigate to the Bluetooth settings menu and select “Pairing.” On your device, enable Bluetooth and search for available devices. Select “Pioneer FH-X720BT” from the list. Follow the on-screen prompts to complete the pairing process. Once connected, you can stream audio wirelessly. If pairing fails, reset the unit or clear previous pairings. For troubleshooting, refer to the manual or restart both devices. A successful connection ensures seamless music streaming and hands-free calls, enhancing your driving experience with convenience and clarity.

4.4 Configuring Audio Settings

Configuring the audio settings on the Pioneer FH-X720BT allows for a personalized listening experience. Use the touchscreen to access the audio menu, where you can adjust settings like EQ, bass, treble, and balance. Select from preset EQ modes or customize settings manually. The unit also supports advanced features like loudness compensation and high-pass filters. For optimal sound, ensure your speakers are properly configured in the settings. Save your preferred settings for quick access. Experiment with different configurations to achieve the best sound quality for your vehicle’s acoustics. This customization ensures a tailored audio experience, enhancing your enjoyment of music, podcasts, or calls.

Troubleshooting Common Issues

Troubleshooting common issues with the Pioneer FH-X720BT involves checking connections, resetting the unit, or consulting the manual for solutions to problems like no power or distorted audio.

5.1 No Power or Display Issues

If your Pioneer FH-X720BT isn’t turning on, ensure all wiring connections are correct, especially the yellow (constant power), red (ignition), and black (ground) wires. Check the inline fuse for blown conditions and verify that the ground wire is securely attached to the car’s metal frame. Ensure the unit is properly mounted in the dashboard and receiving power from the ignition. Consult the manual for reset procedures or troubleshooting steps. If issues persist, contact a professional installer or Pioneer’s customer support for assistance.

5.2 Audio Distortion or No Sound

Audio distortion or no sound issues with the Pioneer FH-X720BT can often be resolved by checking the wiring connections. Ensure all speaker wires are securely connected to the correct terminals and that no wires are loose or damaged. Verify that the unit is properly grounded and that the amplifier (if used) is configured correctly. Check the equalizer settings, as excessive bass or treble levels may cause distortion. If using external devices, ensure they are connected properly via USB, AUX, or Bluetooth. Resetting the unit to factory settings may also resolve the issue. Consult the manual for detailed troubleshooting steps or contact a professional installer for assistance.

5.3 Bluetooth Connectivity Problems

Bluetooth connectivity issues with the Pioneer FH-X720BT can often be resolved by restarting both the unit and the connected device. Ensure the device is in pairing mode and select “Pioneer FH-X720BT” from the available Bluetooth devices list. If the device is not recognized, reset the unit by pressing and holding the volume knob for 10 seconds. Check the Bluetooth settings on your phone or tablet to ensure it is discoverable and properly paired. If issues persist, reset the unit to factory settings or update the firmware to the latest version. Consult the manual for detailed pairing instructions or contact Pioneer support for further assistance.

5.4 USB or Auxiliary Input Issues

If you experience issues with USB or auxiliary inputs on your Pioneer FH-X720BT, start by checking the condition of the cable or auxiliary cord. Ensure it is securely connected to both the unit and your device. If using a USB drive, verify that the files are in a compatible format (e.g., MP3, WMA). Restart the unit by pressing and holding the volume knob for 10 seconds. If the problem persists, check the input selection on the unit to ensure it is set to the correct mode (USB or AUX). Consult the manual for specific file format requirements or reset the unit to factory settings for troubleshooting.

Maintenance and Care

Regularly clean the Pioneer FH-X720BT’s screen with a soft cloth and avoid harsh chemicals. Protect the unit from extreme temperatures and moisture to ensure optimal performance and longevity.

6.1 Cleaning the Unit and Screen

Regular cleaning of the Pioneer FH-X720BT is essential to maintain its functionality and appearance. Use a soft, dry cloth to wipe the screen and exterior surfaces. For stubborn stains, dampen the cloth slightly with water, but avoid harsh chemicals or abrasive materials that could damage the finish or screen. Clean the buttons and controls gently to prevent wear. For the USB and auxiliary ports, use compressed air to remove dust and debris. Avoid exposing the unit to direct sunlight or extreme temperatures, as this can affect performance. By following these steps, you can ensure your Pioneer FH-X720BT remains in optimal condition and continues to deliver exceptional sound quality.

6.2 Updating Firmware

Updating the firmware of your Pioneer FH-X720BT ensures you have the latest features and improvements. Visit Pioneer’s official website to check for firmware updates. Download the update to a USB drive using a computer. Insert the USB into the car stereo’s USB port and follow the on-screen instructions to begin the update process. Ensure the vehicle’s ignition is on and the battery is connected to prevent power loss. Avoid turning off the unit during the update to prevent damage. Once complete, restart the system to apply the changes. Regular firmware updates help maintain optimal performance and compatibility with devices like smartphones and accessories.

6.3 Protecting Against Environmental Factors

To ensure long-term performance, protect your Pioneer FH-X720BT from environmental factors. Avoid exposing the unit to direct sunlight or extreme temperatures, as this can damage the display and internal components. Use a dashboard cover or sunshade to reduce heat exposure. Keep the unit dry, as moisture can cause electrical issues. Avoid installing the stereo in areas prone to water splashes or high humidity. Regularly clean the screen and buttons with a soft cloth to prevent dust buildup. Ensure proper ventilation in the vehicle to prevent overheating. By protecting your Pioneer FH-X720BT from environmental stress, you can maintain its functionality and extend its lifespan for years of reliable use.

Advanced Features and Customization

The Pioneer FH-X720BT offers advanced features like Pioneer Smart Sync for seamless smartphone integration and multi-color illumination for customizable display settings, enhancing your driving experience with personalized preferences.

7.1 Using Pioneer Smart Sync

To utilize Pioneer Smart Sync with the Pioneer FH-X720BT, begin by ensuring your smartphone is compatible with the feature. Both iOS and Android devices are supported. Download the Pioneer Smart Sync app from the App Store or Google Play Store. Once installed, enable Bluetooth on your phone and place the stereo in pairing mode. Navigate to your phone’s Bluetooth settings and select the Pioneer FH-X720BT from the list of available devices to establish a connection. After pairing, you can stream music, manage calls, and access compatible apps directly through the stereo’s interface. For enhanced functionality, explore the app’s settings to customize preferences and optimize your in-car entertainment experience.

7.2 Customizing the Multi-Color Illumination

The Pioneer FH-X720BT offers a multi-color illumination feature, allowing users to personalize their in-car entertainment experience. To customize the lighting, navigate to the display settings menu on the stereo. Select the “Illumination” option and choose from a variety of preset colors or create your own custom color using the RGB adjustment tool. You can also synchronize the lighting with your music for a dynamic visual effect. Additionally, the brightness and color intensity can be adjusted to match your vehicle’s interior or personal preference. This feature enhances both the aesthetic appeal and ambient atmosphere of your car, making every drive more enjoyable and tailored to your style.

7.3 Adjusting EQ Settings for Optimal Sound

The Pioneer FH-X720BT allows users to fine-tune their audio experience with its advanced EQ settings. The built-in 5-band equalizer enables precise adjustments to bass, midrange, and treble frequencies, ensuring a balanced and immersive sound. Users can choose from preset EQ modes such as “Flat,” “Bass Boost,” and “Vocal,” or create custom settings to suit their musical preferences. The equalizer can be accessed through the stereo’s menu, where adjustments can be made using the touchscreen or physical controls. Experimenting with these settings allows for optimal sound reproduction, enhancing the clarity and depth of your music. This feature ensures that your car audio system delivers the best possible performance for any genre or listening environment.

Warranty and Support Information

The Pioneer FH-X720BT comes with a limited warranty, details of which are provided in the included warranty sheet. Customer support is available through Pioneer’s dedicated service team.

8.1 Understanding the Warranty Terms

The Pioneer FH-X720BT is backed by a limited warranty, ensuring coverage for manufacturing defects under normal use. The warranty period varies by region but typically covers parts and labor for a specified duration. To validate the warranty, users must register their product and retain the purchase receipt. The serial number, located on the unit’s bottom, should be recorded on the warranty card for verification. The warranty excludes damage caused by misuse, accidents, or unauthorized modifications. For detailed terms, refer to the warranty document included with the unit or contact Pioneer’s customer support. Regional offices, like Pioneer Electronics of Canada, provide assistance for warranty claims and inquiries.

8.2 Contacting Pioneer Customer Support

For assistance with the Pioneer FH-X720BT, customers can contact Pioneer’s dedicated support team. In Canada, the Customer Satisfaction Department is located at 340 Ferrier Street, Unit 2, Markham, Ontario, L3R 2Z5. The toll-free number is 1-877-283-5901, while the direct line is 905-479-4411. Support is available in both English and French. For international inquiries, visit Pioneer’s official website to find regional contact information. The website also offers resources like manuals, FAQs, and troubleshooting guides. Ensure to have your unit’s serial number ready for efficient assistance. Pioneer’s support team is committed to resolving issues promptly and addressing warranty-related concerns.

8.3 Finding Authorized Service Centers

To locate an authorized Pioneer service center, visit the official Pioneer website and navigate to the “Support” section. Select your region and use the service center locator tool. For users in Canada, the Customer Satisfaction Department at 340 Ferrier Street, Unit 2, Markham, Ontario, L3R 2Z5, can direct you to nearby authorized centers. Contacting customer support at 1-877-283-5901 or 905-479-4411 is also an option. Authorized centers ensure genuine parts and warranty validation. Always verify the center’s authorization status to maintain your unit’s quality and reliability. This step guarantees professional service and adherence to Pioneer’s standards. For international users, the website provides region-specific service center details.

With proper installation and setup, your Pioneer FH-X720BT will deliver exceptional performance. Ensure all connections are secure, and enjoy enhanced audio quality and advanced features for a superior driving experience.

9.1 Final Check and Verification

After completing the installation, perform a final check to ensure all components function correctly. Verify that the Pioneer FH-X720BT powers on, displays properly, and produces clear audio. Test Bluetooth connectivity, USB functionality, and auxiliary inputs. Check that all wiring connections are secure and that no loose ends could cause issues. Ensure the unit is mounted firmly in the dashboard and that all accessories are properly connected. Review the installation manual to confirm all steps were followed accurately. If any issues arise, refer to the troubleshooting section or consult the manual for guidance. A thorough verification ensures optimal performance and a hassle-free experience with your new car stereo.

9.2 Enjoying Your New Pioneer FH-X720BT

With the installation complete, it’s time to enjoy the enhanced features of your Pioneer FH-X720BT. Explore the intuitive interface, customize the multi-color illumination to match your car’s interior, and take advantage of seamless Bluetooth connectivity for hands-free calls and wireless audio streaming. Connect your favorite devices via USB or auxiliary inputs and enjoy high-quality sound with crystal-clear playback. Utilize the Pioneer Smart Sync app for voice command functionality and easy navigation; Adjust the EQ settings to tailor the audio to your preferences; Whether you’re streaming music, navigating, or taking calls, the FH-X720BT offers a premium in-car entertainment experience designed to make every drive more enjoyable and convenient.

paradise parents guide

Welcome to the Paradise Parents Guide, a comprehensive resource designed to help parents nurture, guide, and support their children effectively. This guide offers practical insights and strategies to create a loving, safe, and encouraging environment, fostering holistic development and resilience in children.

Understanding the Concept of Paradise Parenting

Paradise Parenting is a nurturing approach that emphasizes creating a loving, safe, and encouraging environment for children to thrive. It focuses on fostering emotional intelligence, open communication, and positive reinforcement to help children develop resilience and confidence. By prioritizing empathy, kindness, and understanding, parents can guide their children toward holistic growth. This approach encourages children to explore their potential while providing clear boundaries and support. Paradise Parenting is about balancing freedom with structure, helping children navigate life’s challenges while fostering a sense of security and belonging. It’s a journey of empowerment, where parents and children grow together, creating a foundation for lifelong well-being.

Key Principles of Effective Parenting in Paradise

Effective parenting in Paradise revolves around fostering a balanced, nurturing environment. Key principles include setting clear boundaries, encouraging open communication, and practicing positive reinforcement. Parents should prioritize emotional intelligence, helping children understand and manage their feelings. Modeling kindness, empathy, and responsibility is crucial for shaping their moral compass. Consistency in discipline and rewards ensures stability, while allowing children to learn from natural consequences promotes resilience. Encouraging curiosity and exploration, while maintaining a safe and supportive space, helps children thrive. By embracing these principles, parents create a foundation for their children to grow into confident, compassionate, and well-rounded individuals. These strategies help build a harmonious and enriching family life.

Building a Nurturing Environment

Creating a nurturing environment involves fostering a safe, loving, and supportive space where children feel secure, valued, and encouraged to thrive emotionally and physically.

Creating a Safe and Loving Home Atmosphere

A safe and loving home atmosphere is foundational for a child’s emotional and psychological well-being. Parents can foster this by promoting open communication, active listening, and validation of feelings. Creating a stable and predictable environment helps children feel secure. Encouraging positivity through praise and affection strengthens self-esteem. Establishing consistent routines and boundaries provides a sense of order, while involving children in decision-making empowers them. Modeling kindness and respect teaches valuable life skills. A nurturing atmosphere not only supports academic success but also helps children develop resilience and confidence, laying the groundwork for a happy and fulfilling life.

Importance of Open Communication

Open communication is the cornerstone of a healthy parent-child relationship, fostering trust, understanding, and emotional resilience. Parents should encourage children to express their thoughts and feelings freely, creating a judgment-free space for dialogue. Active listening and validation are key, ensuring children feel heard and valued. Using age-appropriate language and asking open-ended questions can deepen conversations. Sharing experiences and emotions as a family strengthens bonds and teaches empathy. Open communication also helps children develop problem-solving skills and builds confidence. By fostering this connection, parents empower their children to navigate life’s challenges with clarity and emotional intelligence, leading to stronger, more meaningful relationships.

Encouraging Emotional Intelligence

Emotional intelligence (EI) is the ability to recognize, understand, and manage emotions in oneself and others. Encouraging EI in children helps them navigate social situations, build strong relationships, and make informed decisions. Parents can foster EI by labeling and validating emotions, teaching empathy, and modeling healthy emotional expression. Engage in conversations about feelings, encourage problem-solving, and provide guidance on managing negative emotions. Activities like role-playing and storytelling can also enhance EI. By fostering emotional awareness and resilience, parents equip their children with lifelong skills for personal and interpersonal success, enabling them to thrive in a complex and ever-changing world with confidence and compassion.

Discipline and Boundaries

Effective discipline involves setting clear boundaries, promoting consistency, and using positive reinforcement to guide behavior. It fosters responsibility, respect, and self-regulation, helping children thrive in a structured environment.

Setting Clear Boundaries for Children

Establishing clear boundaries is essential for fostering a sense of security and responsibility in children. These boundaries provide a framework for acceptable behavior, helping kids understand expectations and consequences. Consistency is key—clear, concise rules ensure children know what is expected of them. Positive reinforcement, such as praise for adhering to rules, encourages good behavior. Natural consequences, like losing privileges for misbehavior, teach accountability. By setting these boundaries, parents guide children toward independence and self-regulation, promoting emotional growth and resilience. Open communication about these limits ensures children feel safe and supported as they navigate their world. This approach builds trust and respect.

Positive Reinforcement Techniques

Positive reinforcement is a powerful tool to encourage desirable behavior in children. By focusing on rewards and praise, parents can motivate kids to make positive choices. Simple gestures like verbal praise, stickers, or stars on a chart can reinforce good behavior. Consistency is key—acknowledge achievements promptly and genuinely. Non-verbal cues, such as thumbs-ups or smiles, also work well. Over time, this approach fosters self-confidence and a willingness to repeat positive actions. It’s important to balance rewards with teaching the intrinsic value of good behavior. By using positive reinforcement, parents create a supportive environment where children feel encouraged and motivated to thrive.

Natural Consequences of Actions

Allowing children to experience the natural consequences of their actions is a valuable teaching tool. When kids make choices, they should face the logical outcomes, helping them understand responsibility and cause-and-effect relationships; For example, forgetting homework leads to consequences at school, teaching accountability. Parents should resist the urge to intervene, giving children the opportunity to learn from mistakes. This approach fosters problem-solving skills and self-awareness. However, it’s important to ensure the consequences are age-appropriate and not harmful. By guiding children through reflection on their actions, parents help them develop resilience and better decision-making abilities. Consistency and support are key to making this strategy effective.

Education and Learning

Fostering a love for learning is essential for a child’s growth. Encourage curiosity, exploration, and critical thinking to help them thrive academically and personally.

Encouraging Curiosity and Exploration

Nurturing curiosity and exploration is vital for a child’s cognitive and creative development. Encourage them to ask questions, explore their surroundings, and seek answers through hands-on experiences. Foster a mindset where curiosity is celebrated, allowing them to discover new interests and passions. Provide resources like books, educational toys, and opportunities to engage in activities that spark their imagination. Encourage them to think critically and solve problems independently, which builds confidence and resilience. By supporting their natural desire to explore, you help them develop a lifelong love for learning and a sense of adventure that will guide them throughout their lives.

Homework and Study Habits

Establishing consistent homework and study habits is essential for academic success. Create a dedicated study space free from distractions, promoting focus and productivity. Teach your child to organize tasks, prioritize assignments, and manage time effectively. Encourage regular breaks to maintain concentration and prevent burnout. Foster a growth mindset by praising effort and progress, not just results. Monitor their workload and offer guidance without doing the work for them. Instill accountability by teaching them to review and correct their own mistakes. By fostering these habits, you empower your child to develop self-discipline, responsibility, and a lifelong commitment to learning. These routines will serve them well beyond their school years.

Role of Extracurricular Activities

Extracurricular activities play a vital role in fostering well-rounded development in children. They provide opportunities for physical, emotional, and social growth beyond academics. Engaging in sports, clubs, or creative pursuits helps build teamwork, leadership, and problem-solving skills. These activities also encourage creativity, self-expression, and confidence. By participating in extracurriculars, children learn time management and balancing responsibilities. They also develop social connections and empathy by interacting with diverse peers. Moreover, extracurriculars can reveal hidden talents and passions, shaping future interests and career paths. Encouraging participation in these activities enriches your child’s life, preparing them for lifelong success and fulfillment. They are essential for holistic development.

Health and Wellness

Promoting physical activity, balanced nutrition, and healthy sleep patterns is essential for children’s overall well-being. These habits support growth, energy, and long-term health, fostering a thriving lifestyle.

Importance of Physical Activity

Physical activity is a cornerstone of children’s health, fostering strength, coordination, and overall well-being. Regular exercise enhances cardiovascular health, improves mental clarity, and reduces stress. Encourage outdoor play, sports, or simple activities like walking or cycling. These habits not only promote physical development but also cultivate a lifelong appreciation for staying active. Parents should lead by example, making exercise a family affair. Aim for at least an hour of moderate activity daily, ensuring it’s enjoyable to sustain engagement. This approach supports both physical and emotional growth, creating a nurturing environment for children to thrive.

Nutrition and Healthy Eating Habits

Nurturing healthy eating habits is essential for children’s growth and long-term well-being. A balanced diet rich in fruits, vegetables, lean proteins, and whole grains provides the energy and nutrients needed for physical and mental development. Parents should model healthy eating behaviors and involve children in meal planning and preparation to foster an appreciation for nutritious food. Encourage variety to ensure a broad intake of vitamins and minerals. Limit sugary and processed foods, promoting water over sugary drinks. Establishing consistent mealtimes and a positive atmosphere during meals can help children develop a healthy relationship with food, setting the stage for a lifetime of wellness.

Sleep Patterns and Their Impact

Establishing consistent sleep patterns is crucial for children’s physical, emotional, and cognitive development. A well-rested child demonstrates better concentration, improved mood, and enhanced academic performance. Parents should create a calming bedtime routine, such as reading or relaxing activities, to signal the body that it’s time to sleep. Ensuring the sleep environment is comfortable and free from distractions, like screens, can improve sleep quality. Sticking to a regular sleep schedule, even on weekends, helps regulate the body’s internal clock. Encouraging healthy sleep habits from an early age can have long-lasting benefits, promoting overall health and resilience in children.

Social Development

Social development is essential for children to build positive relationships and thrive in their communities. It fosters empathy, communication skills, and the ability to collaborate with others effectively.

Teaching Empathy and Kindness

Teaching empathy and kindness is crucial for helping children understand and respect others’ feelings. Parents can model compassionate behavior, encouraging children to consider different perspectives. Simple acts, like sharing or helping others, foster a sense of responsibility and warmth. Open discussions about emotions and the impact of their actions can deepen their understanding. Praising kind gestures reinforces positive behavior, while guiding them to resolve conflicts peacefully nurtures emotional intelligence. By fostering a culture of empathy, parents equip their children with essential social skills that promote harmony and understanding in all relationships. Consistent practice and positive reinforcement are key to developing these traits.

Building Friendships and Social Skills

Helping children build friendships and social skills is essential for their emotional and psychological growth. Parents can encourage participation in group activities, sports, or clubs, fostering teamwork and collaboration. Modeling positive interactions and teaching effective communication skills, such as active listening and expressing emotions, can help children connect with others. Encouraging empathy and inclusivity promotes meaningful relationships. Guiding children through conflicts and teaching problem-solving strategies equips them with lifelong social abilities. Praising positive interactions and offering constructive feedback when needed helps refine their social behaviors. By nurturing these skills, parents empower their children to form strong, lasting friendships and thrive in social environments.

Dealing with Peer Pressure

Peer pressure is a common challenge children face, influencing their decisions and behaviors. Parents play a crucial role in equipping kids with the skills to handle such situations confidently. Open conversations about peer pressure help children understand its implications and develop strategies to resist negative influences. Encouraging critical thinking and self-confidence empowers them to make independent choices. Role-playing scenarios can prepare kids to respond to pressure effectively. Teaching empathy and the importance of kindness fosters a supportive environment, helping children navigate social dynamics positively. By guiding them to prioritize their values and well-being, parents can help build resilience against peer pressure and promote healthy relationships.

Technology and Media

In today’s digital age, balancing technology use is essential for healthy child development. This section explores effective strategies for managing screen time, ensuring online safety, and leveraging technology for learning.

Managing Screen Time Effectively

Balancing technology use is crucial for children’s well-being. Set clear limits on screen time, prioritizing physical and creative activities. Use parental controls to monitor and restrict access to inappropriate content. Encourage outdoor play and hobbies to reduce reliance on screens. Educate children about digital literacy and the importance of responsible media consumption. Lead by example, demonstrating healthy screen habits yourself. Establish screen-free zones, like the dinner table or bedrooms, to promote family interaction and relaxation. Regularly review and adjust screen time rules as your child grows, ensuring they align with their developmental needs and your family values.

Online Safety and Digital Literacy

Teaching children to navigate the digital world safely is essential. Start by setting clear boundaries and monitoring online activities to protect them from harmful content. Educate your child about privacy settings and the risks of sharing personal information. Discuss the dangers of cyberbullying, phishing, and inappropriate material. Encourage critical thinking to help them evaluate online sources and avoid misinformation. Foster open conversations about their digital experiences and listen to their concerns. Use parental controls and filtering tools to restrict access to unsafe websites. Teach them how to report suspicious activity and block unwanted contacts. By promoting digital literacy, you empower your child to use technology responsibly and confidently.

Using Technology for Learning

Technology can be a powerful tool for education when used wisely. Encourage your child to explore educational apps, online resources, and interactive learning platforms that align with their interests and curriculum. Teach them how to use search engines effectively to find reliable information for school projects. Introduce tools like Google Classroom or Khan Academy for structured learning. Balance screen time with hands-on activities to ensure a well-rounded education. Foster digital curiosity while guiding them to use technology responsibly. By integrating technology thoughtfully, you can enhance their learning experience and prepare them for a tech-driven future. Encourage critical thinking and creativity in their digital explorations.

Family Values and Traditions

Family values and traditions are the foundation of a nurturing home environment. They shape a child’s identity, foster belonging, and provide a sense of cultural connection.

Instilling Family Values

Instilling family values is essential for fostering a strong moral compass in children. Parents should lead by example, demonstrating honesty, respect, and kindness. Establishing clear expectations and consistently reinforcing positive behaviors help shape a child’s character. Encourage open conversations about values like empathy, responsibility, and integrity. Create meaningful family rituals, such as shared meals or community service, to reinforce these principles. Teach children to understand and respect diverse perspectives while staying true to your family’s core beliefs. Positive role models and consistent guidance will help your child develop a strong sense of right and wrong, guiding them throughout their lives.

Creating Meaningful Family Traditions

Creating meaningful family traditions fosters a sense of belonging and strengthens family bonds. These traditions can be simple, such as weekly family dinners, game nights, or outdoor activities. Celebrating holidays with unique rituals, like decorating together or sharing stories, adds depth to your family’s cultural identity. Encourage participation from all members, allowing everyone to contribute ideas. Consistency is key—repeating these activities over time creates lasting memories. Whether it’s a yearly camping trip or a bedtime routine, meaningful traditions provide comfort and continuity, helping children feel secure and connected to their family’s heritage. These practices become cherished moments that shape their identity and values.

Importance of Family Bonding

Family bonding is the cornerstone of a nurturing and supportive home environment. Strong relationships between family members foster emotional security, trust, and mutual respect. Engaging in shared activities, such as family dinners, outdoor outings, or creative projects, strengthens these bonds. Open communication and active listening allow children to feel heard and valued, while collaborative problem-solving teaches teamwork and empathy. Consistent quality time helps children develop a sense of belonging and stability. By prioritizing family bonding, parents create a foundation for resilience, emotional intelligence, and lifelong connections. These meaningful interactions shape a child’s identity and provide a sense of security, essential for their growth and well-being.

Handling Challenges

Nurturing resilience in children involves addressing behavioral issues, supporting them through difficult times, and teaching effective conflict resolution strategies to foster emotional strength and problem-solving skills.

Addressing Behavioral Issues

Addressing behavioral issues in children requires patience, consistency, and understanding. Identify triggers, stay calm, and communicate clearly to help your child recognize and manage their emotions. Encourage open dialogue to understand their perspective while setting clear, age-appropriate expectations. Positive reinforcement and natural consequences can guide them toward better choices. Teaching problem-solving skills empowers them to handle conflicts and make responsible decisions. Consistency in applying boundaries and consequences fosters a sense of security and responsibility. By modeling positive behavior and offering support, you help your child develop self-regulation skills and a strong moral foundation. This approach nurtures resilience and emotional intelligence.

Supporting Children Through Difficult Times

Supporting children through challenging moments is essential for their emotional and psychological well-being. Listen actively to their concerns, validate their feelings, and create a safe space for open dialogue. Consistency and routine provide stability, helping them feel secure; Encourage expression of emotions through creative or verbal means. Model healthy coping strategies to teach resilience. Acknowledge their efforts and progress, fostering confidence. Help them identify solutions and learn from experiences. Strengthen their support network by connecting them with trusted family, friends, or professionals. By offering empathy, guidance, and unconditional love, you empower your child to navigate adversity and grow stronger. This nurturing approach fosters long-term emotional intelligence and resilience.

Conflict Resolution Strategies

Teaching children effective conflict resolution skills is crucial for their emotional and social development. Encourage open communication, active listening, and empathy to understand different perspectives. Stay calm and neutral when mediating disputes, guiding your child to express their feelings and needs clearly. Teach problem-solving techniques, such as brainstorming solutions together and evaluating their fairness. Model healthy conflict resolution by demonstrating respect and patience in your own interactions. Set clear expectations for respectful behavior and intervene when necessary to prevent escalation. Praise efforts to resolve conflicts peacefully, fostering a sense of responsibility and cooperation. These strategies help build resilience and strong relationships.

Parental Self-Care

Prioritizing self-care is essential for parents to maintain emotional balance and effectiveness. Engage in activities that recharge your energy, manage stress, and foster personal well-being.

Importance of Self-Care for Parents

Self-care is vital for parents to maintain emotional and physical well-being, ensuring they can effectively nurture their children. Neglecting self-care can lead to burnout, impacting patience and decision-making. By prioritizing activities that bring joy and relaxation, parents can recharge and model healthy habits for their kids. Simple practices, like exercise, mindfulness, or hobbies, can significantly improve mental clarity and energy levels. Remember, caring for yourself is not selfish—it’s essential to being a supportive and present parent. Consistent self-care fosters resilience, enabling parents to handle life’s challenges with grace and positivity, creating a harmonious family environment.

Managing Stress and Burnout

Managing stress and burnout is crucial for maintaining balance and effectiveness in parenting. Chronic stress can diminish patience and increase irritability, affecting relationships with children. Parents can alleviate stress through mindfulness practices, such as deep breathing or meditation, which help calm the mind and reduce tension. Setting realistic expectations and delegating tasks when possible also prevents overwhelm. Engaging in hobbies and seeking support from loved ones or professional counselors can provide relief and perspective. By addressing stress proactively, parents can maintain their well-being and create a more peaceful and loving home environment for their families to thrive. Regular self-care is key to avoiding burnout.

Seeking Support When Needed

Recognizing when to seek support is a sign of strength, not weakness. Parents often face challenges that require external guidance to navigate effectively. Building a strong support network, including family, friends, and community groups, can provide emotional and practical assistance. Online forums, parenting classes, and counseling services are valuable resources that offer tailored advice and reassurance. Don’t hesitate to reach out to professionals, such as therapists or educators, for specialized guidance. Seeking support not only benefits parents but also enhances their ability to care for their children, fostering a more balanced and loving home environment. Remember, asking for help is a courageous step toward growth and well-being.

The Paradise Parents Guide equips you with essential tools and insights to foster a nurturing environment, promoting holistic child development and resilience. Embrace its principles to empower your family’s growth and well-being.

Summarizing Key Takeaways

The Paradise Parents Guide emphasizes creating a nurturing environment, fostering emotional intelligence, and setting clear boundaries. It highlights the importance of open communication, physical activity, and healthy eating habits. Parents are encouraged to promote curiosity, support social development, and manage screen time effectively. The guide also underscores the value of family traditions, conflict resolution, and parental self-care. By balancing guidance with independence, parents can help their children thrive. These strategies empower families to build resilience, kindness, and lifelong learning, ensuring a strong foundation for future success.

Encouragement for Continuous Growth

The Paradise Parents Guide advocates for fostering a mindset of continuous growth within families. By embracing curiosity and lifelong learning, parents can inspire their children to explore new interests and develop resilience. Encouraging open dialogue and emotional intelligence helps children navigate challenges with confidence. Parents are urged to model positive behaviors and seek opportunities for personal development, creating a supportive environment where growth is celebrated. This approach not only benefits children but also strengthens family bonds, ensuring that every member thrives. By prioritizing growth, families can adapt to life’s changes and build a brighter future together, fostering a culture of continuous improvement and harmony.

wahl beard trimmer attachments guide

Wahl beard trimmer attachments are essential for achieving precise, customizable grooming. They offer versatility, allowing users to maintain various beard styles with ease and accuracy, ensuring optimal results.

1.1 Overview of Wahl Beard Trimmers and Their Attachments

Wahl beard trimmers are renowned for their precision and versatility, offering a range of attachments designed to cater to diverse grooming needs. These attachments, including guide combs, adjustable guards, and specialized trimming heads, enable users to achieve various beard styles, from short stubble to long, neatly groomed beards. Wahl’s innovative designs ensure compatibility across multiple models, with attachments crafted from durable materials like stainless steel for optimal performance. Whether for maintenance, styling, or creating defined edges, Wahl’s trimmer attachments provide the tools needed for a polished, professional finish.

1.2 Importance of Using the Right Attachments for Your Beard

Using the right Wahl beard trimmer attachments is crucial for achieving your desired beard style while maintaining skin health. Proper attachments ensure even cutting, prevent uneven patches, and reduce irritation. They also protect your skin from direct blade contact, making grooming safer and more comfortable. With the right tools, you can precisely control beard length and shape, whether you prefer a clean look or a well-defined style. Investing in suitable attachments enhances both the quality of your trim and the longevity of your Wahl trimmer, ensuring optimal performance and satisfaction.

Types of Wahl Beard Trimmer Attachments

Wahl offers a variety of attachments, including guide combs, adjustable combs, close trimming heads, and long beard attachments, each designed for specific beard styles and maintenance needs.

2.1 Guide Combs (Beard Trimmer Guards)

Guide combs, or beard trimmer guards, are essential attachments for maintaining even beard lengths. They come in various sizes, offering precision cutting for styles ranging from short stubble to longer beards. Made from durable materials like stainless steel or high-quality plastic, these combs ensure smooth trimming and prevent skin irritation. Adjustable guide combs add versatility, allowing users to customize lengths without changing attachments. Regular cleaning and proper storage are key to maintaining their performance. These combs are indispensable for achieving consistent results and defining beard styles with ease.

2.2 Adjustable Guide Combs for Versatility

Adjustable guide combs offer unmatched versatility for grooming. These attachments allow users to trim at multiple lengths without changing combs, catering to diverse beard styles. With a simple adjustment, they can achieve precise cuts for short stubble or longer beards. Made from durable materials like stainless steel, they ensure smooth trimming and prevent skin irritation. Their ergonomic design makes them easy to attach and adjust, providing seamless integration with Wahl trimmers. This feature-rich accessory is ideal for maintaining consistent styles and exploring various looks effortlessly.

2.3 Close Trimming Attachments for Short Stubble

Close trimming attachments are perfect for maintaining short stubble, offering precise control for a neat, clean look. These attachments typically range from 0.5 to 1.5mm, allowing for ultra-close cuts without irritation. Designed for versatility, they enable smooth trimming around the jawline, neck, and edges. Ideal for men seeking a sharp, defined appearance, these attachments ensure even results. Their compact design makes them easy to maneuver, while durable materials guarantee long-lasting performance. For those who prefer a minimalist beard style, close trimming attachments are an essential tool in their grooming arsenal.

2.4 Long Beard Trimming Attachments

Long beard trimming attachments are designed for managing extended facial hair, offering precise control for styling and maintaining longer beard lengths. These attachments typically range from 8 to 25mm, providing ample versatility for taming and shaping fuller beards. They feature durable materials and ergonomic designs, ensuring comfort and accuracy during use. Ideal for those who prefer a more substantial beard, these attachments help achieve a neat, polished appearance while preventing split ends. With their adjustable settings, they cater to various beard styles, making them a must-have for long beard enthusiasts.

2.5 Tapering and Blending Attachments

Tapering and blending attachments are specialized tools designed to create seamless transitions between different beard lengths. These attachments allow for precise control when shaping the neck, jawline, and edges, ensuring a smooth, natural-looking fade. They are ideal for achieving definition and layering, making them essential for modern beard styles. By adjusting the angle and position of the attachment, users can craft polished, professional-looking results. These attachments are particularly useful for creating sharp lines and blending longer beard sections with shorter areas, enhancing overall beard definition and style.

2.6 Stainless Steel vs. Plastic Attachments

Wahl beard trimmer attachments are available in stainless steel and plastic, each offering unique benefits. Stainless steel attachments are durable, rust-resistant, and provide precise cutting performance, making them ideal for long-term use. Plastic attachments, while lighter and more affordable, are best suited for less frequent use or lighter beard styles. Both materials are designed for ease of cleaning and maintenance, ensuring optimal hygiene. Choosing between them depends on personal preference, grooming needs, and the level of durability desired for your beard care routine.

How to Use Wahl Beard Trimmer Attachments

Using Wahl beard trimmer attachments is straightforward. Attach the desired guide comb, trim in smooth strokes, and adjust for different beard styles. Always follow safety guidelines for optimal results.

3.1 Attaching the Guide Comb to the Trimmer

Attaching the guide comb to your Wahl beard trimmer is a simple process. Start by aligning the comb with the trimmer blade at a slight angle. Gently slide it onto the trimmer until it clicks into place, ensuring it is securely fastened. Always make sure the comb is properly attached before use to avoid any slippage. For added safety, perform a quick test on a small area of your beard to ensure the attachment is stable and functioning correctly. This step is crucial for achieving precise trimming results.

3.2 Trimming and Tapering Your Beard with Attachments

Trimming and tapering your beard with Wahl attachments ensures a polished look. Start by attaching the appropriate guide comb for your desired length. Hold the trimmer at a slight angle, with the blades facing the direction of hair growth. Begin at the sideburns and work downward, using smooth, steady strokes. For tapering, use the adjustable guide comb to blend lengths seamlessly. Finish by defining edges with a close trim attachment, ensuring crisp lines and a professional finish. This technique helps achieve a tailored, even beard style with minimal effort.

3.3 Maintaining Short Stubble with Close Trimming Attachments

Maintaining short stubble requires the right Wahl attachments. Close trimming attachments, typically ranging from grades 0.5-1.5 (1.5-4.5mm), are ideal for achieving a neat, uniform look. Attach the desired guide comb and trim in the direction of hair growth for even results. Use smooth, steady strokes to ensure consistency. Regular use prevents ingrown hairs and keeps the stubble looking healthy and defined. These attachments are perfect for those who prefer a clean, low-maintenance style while keeping their beard looking sharp and well-groomed.

3.4 Using Adjustable Guide Combs for Different Lengths

Adjustable guide combs offer versatility for various beard lengths. Wahl’s 6-position adjustable comb allows users to trim at different settings, ensuring precise control. To use, attach the comb to the trimmer and select the desired length. Start trimming from the sideburns, moving downward toward the neck, and finish with smooth strokes toward the chin. This attachment is ideal for maintaining consistent lengths and blending styles seamlessly. Its adjustable feature ensures customization, making it perfect for both short trims and longer beard styles with ease and accuracy.

3.5 Blending and Defining Your Beard with Tapering Attachments

Tapering attachments are designed to create seamless transitions between different beard lengths. Use them to define edges and blend areas smoothly. Start by attaching the tapering comb and trimming from the temple downward. This ensures a natural-looking gradient. Wahl’s attachments are precision-engineered for sharp, clean lines. For a polished finish, trim in smooth, consistent strokes, following the beard’s natural contour. This technique allows for professional-style blending and definition, perfect for creating a refined, modern look with ease and precision.

Wahl Beard Trimmer Attachment Maintenance

Regular maintenance ensures Wahl attachments perform optimally. Clean after use, store properly, and replace worn parts. Lubricate blades for smooth operation and extend attachment longevity.

4.1 Cleaning and Sanitizing Attachments

Cleaning and sanitizing Wahl beard trimmer attachments are crucial for hygiene and performance. Use a soft brush to remove hair clippings, then wash with mild soap and warm water. Rinse thoroughly and dry to prevent rust. For sanitizing, dip attachments in alcohol or use a disinfectant spray. Avoid harsh chemicals that may damage materials. Regular cleaning ensures optimal trimmer function and prevents bacterial buildup, keeping your grooming routine safe and effective. This maintenance step is essential for extending the lifespan of your attachments and maintaining peak performance.

4.2 Storing Attachments Properly

Proper storage of Wahl beard trimmer attachments is essential for maintaining hygiene and preventing damage. Store them in a cool, dry place, away from direct sunlight and moisture. Use a protective case or pouch to keep attachments organized and prevent scratching. Avoid storing attachments in damp environments, as this can lead to rust or bacterial growth. For added convenience, keep a storage case or the original packaging to maintain order and protect your attachments. Proper storage extends the lifespan of your trimmer attachments and ensures they remain in pristine condition for future use.

4.3 Replacing Worn-Out Attachments

Regularly replacing worn-out Wahl beard trimmer attachments is crucial for maintaining optimal performance and hygiene. Over time, attachments may become dull, rusted, or misaligned, affecting trimming accuracy. Check for visible wear, such as frayed edges or corrosion, and replace them promptly. Genuine Wahl replacement parts are available online or at authorized retailers, ensuring compatibility and quality. Replace attachments every 6-12 months or sooner if damage is noticeable. This ensures your trimmer continues to deliver precise results and maintains your beard’s appearance effectively.

4.4 Lubricating Trimmer Blades for Optimal Performance

Lubricating Wahl beard trimmer blades is essential to maintain their sharpness and performance. Apply a few drops of Wahl blade oil to the blades after cleaning and before use to ensure smooth operation. Regular lubrication prevents dullness and overheating, extending the life of your trimmer. For best results, use Wahl-approved oils designed for their trimmers. Proper lubrication ensures precise cuts, reduces friction, and keeps your trimmer running efficiently for years. This simple step is crucial for maintaining optimal grooming results.

Popular Wahl Beard Trimmer Kits and Their Attachments

Wahl offers top-tier beard trimmer kits with versatile attachments, including guide combs, adjustable settings, and close-trimming heads, catering to various beard styles and grooming needs effectively.

5.1 Wahl Stainless Steel Lithium Ion Beard Trimmer

The Wahl Stainless Steel Lithium Ion Beard Trimmer is a premium grooming tool designed for precision and durability. It features high-quality stainless steel blades and a powerful lithium-ion battery for long-lasting performance. This trimmer comes with multiple attachments, including adjustable guide combs and close-trimming heads, allowing users to achieve various beard styles effortlessly. Its ergonomic design ensures comfortable handling, while the advanced battery technology provides extended cordless use. Ideal for maintaining short stubble or sculpting longer beards, this trimmer is a top choice for those seeking versatility and reliability in their grooming routine.

5.2 Wahl Aqua Blade Beard and Stubble Trimmer

The Wahl Aqua Blade Beard and Stubble Trimmer is a high-performance grooming tool designed for precision and comfort. Featuring advanced battery technology, it offers long battery life and quick charging for convenience. The trimmer includes close-trim attachments and adjustable guide combs, making it ideal for maintaining short stubble or sculpting detailed beard styles. Its ergonomic design ensures a comfortable grip, while the waterproof feature allows for easy cleaning. Perfect for achieving a close shave or tidy stubble, this trimmer is a practical choice for everyday grooming needs.

5.3 Wahl Color Pro Cordless Rechargeable Hair Clipper

The Wahl Color Pro Cordless Rechargeable Hair Clipper is a versatile grooming tool designed for precision and ease of use. It features color-coded guide combs, making it easy to identify and select the right length for your desired style. The cordless design offers convenience, while the rechargeable battery ensures extended use. Perfect for trimming beards, hair, and stubble, this clipper comes with a storage bag and barber cape. Its ergonomic design and lightweight construction make it ideal for both professional and at-home use, catering to men, women, and children alike.

5.4 Wahl Multigroomer Kits with Multiple Attachments

Wahl Multigroomer Kits are designed for ultimate versatility, offering multiple attachments for precise grooming. These kits typically include a standard trimmer head, adjustable guide combs, and additional accessories for beard, stubble, and body trimming. The ergonomic design ensures comfort during use, while the cordless operation provides convenience. With interchangeable attachments, users can achieve a wide range of styles, from maintaining short stubble to sculpting longer beards. These kits are ideal for men seeking a comprehensive grooming solution in one convenient package.

Troubleshooting Common Issues with Attachments

Troubleshooting common issues with Wahl attachments involves checking proper fit, ensuring blades are clean, and lubricating for smooth operation. Addressing these helps maintain optimal performance and longevity.

6.1 Why Attachments May Not Fit Properly

Attachments may not fit properly due to incorrect model compatibility, worn or damaged release tabs, or improper alignment. Ensure the attachment is designed for your specific Wahl trimmer model and that all locking mechanisms are functioning correctly. If the attachment slips or moves during use, check for wear on the trimmer head or attachment connectors. Regular maintenance, such as cleaning and lubricating, can also help ensure a secure fit and optimal performance.

6.2 Fixing Attachments That Slip or Move During Use

If attachments slip or move during use, ensure they are properly aligned and securely locked. Check for worn or damaged parts, such as the release tab or connector pins, and replace them if necessary. Clean the trimmer head and attachment connectors to remove dirt or oil buildup, which can interfere with the fit. For optimal stability, always attach the guide comb at a slight angle and press firmly until it clicks into place. Regularly lubricating the trimmer blades can also improve performance and reduce slippage.

6.3 Resolving Issues with Trimmer Performance

For optimal performance, ensure blades are clean and free from debris. Regularly lubricate the trimmer with clipper oil to maintain smooth operation. If the trimmer struggles to cut evenly, check for dull blades or misaligned attachments. Clean or replace worn-out guide combs to prevent uneven trimming. For cordless models, charge the battery fully and avoid using low-power settings. Properly securing attachments and ensuring they are compatible with your Wahl trimmer model can also resolve performance issues. Regular maintenance enhances efficiency and extends the lifespan of your trimmer.

Expert Tips for Using Wahl Beard Trimmer Attachments

Start with longer guide combs for even cuts, then use shorter ones for detailing. Trim in small sections for precision. Use tapering attachments for seamless blending. Regularly oil blades for smooth operation.

7.1 Choosing the Right Attachment for Your Beard Style

Choosing the right Wahl beard trimmer attachment depends on your desired beard style. For short stubble, opt for close trimming attachments (0.5-1.5mm). Medium-length beards benefit from adjustable guide combs (3-6mm), while long beards require larger guide combs (8-25mm). Tapering and blending attachments are ideal for creating defined edges and seamless transitions. Consider your face shape and personal style when selecting attachments. Adjustable guide combs offer versatility for multiple looks. Always match the attachment size to your beard length for a clean, professional finish.

7.2 How to Achieve a Close Trim and Stubble Look

To achieve a close trim and stubble look, use Wahl’s close trimming attachments (0.5-1.5mm). Start by trimming with the grain for even results. Attach the guide comb, ensuring it’s secure, and stroke downward from the sideburns to the neck. Use smooth, overlapping motions for consistency. For stubble, maintain the same technique, adjusting the attachment as needed. Regularly oil the blades and clean the attachment after use to preserve performance. This method ensures a neat, professional finish for short beard styles, enhancing your grooming routine’s effectiveness.

7.3 Mastering the Art of Tapering and Blending

Mastering tapering and blending requires precision and the right attachments. Use Wahl’s tapering combs to create seamless transitions between lengths. Start with a longer guide comb on the cheeks and gradually switch to shorter ones near the neck for a natural fade. Hold the trimmer at a slight angle to blend edges smoothly. Follow the grain to avoid unevenness and use slow, steady strokes for control. This technique ensures a polished, professional look, making your beard appear well-defined and neatly tapered without harsh lines or visible transitions.

Wahl Beard Trimmer Attachment Size Guide

Wahl beard trimmer attachments come in various sizes to suit different beard styles and face shapes. Guide combs range from 1/16″ to 1″ for precise cutting lengths, ensuring versatility.

8.1 Understanding Guide Comb Sizes and Lengths

Guide combs for Wahl beard trimmers are available in a range of sizes, typically from 1/16″ to 1″, allowing for precise control over beard length. These combs are designed to snap onto the trimmer blade, ensuring even cutting and preventing skin irritation. The size of the comb determines the length of the beard, with smaller numbers corresponding to shorter lengths. Wahl offers color-coded systems for easy identification, making it simpler to choose the right comb for your desired style. This versatility ensures a customizable grooming experience for all beard types and preferences.

8.2 Hair Clipper Guard Size Chart for Wahl Trimmers

A Wahl beard trimmer guard size chart helps users identify the correct comb for their desired beard length. The chart typically ranges from 1/16″ (1.5mm) to 1″ (25mm), with each size corresponding to a specific guide comb. For example, a #1 guard trims to 1/8″ (3mm), while a #8 guard allows for longer beard lengths at 1″ (25mm). This chart ensures precise trimming and helps users achieve their preferred style effortlessly. Referencing the chart prevents guesswork, making it easier to maintain a consistent look with Wahl trimmers.

8.3 Matching Attachment Sizes to Your Beard Style

Matching the right attachment size to your beard style is crucial for a polished look. Smaller guide combs (1/16″ to 1/4″) are ideal for short stubble or precise edges, while larger sizes (1″ to 2″) suit longer, fuller beards. Adjustable combs offer versatility, allowing you to toggle between lengths seamlessly. For a natural fade, pair tapering attachments with your trimmer. Always consult Wahl’s size chart to ensure the perfect fit for your desired style, whether it’s a neat stubble, a defined goatee, or a flowing beard.

How to Select the Right Attachments for Your Face Shape

Choose attachments based on your face shape to enhance symmetry. Round faces benefit from shorter sides, while oval and square faces can handle varied lengths. Heart-shaped faces suit chin volume.

9.1 Choosing Attachments for Round Face Shapes

For round face shapes, selecting the right attachments is key to balancing proportions. Opt for shorter guide combs (1/16″ to 1/4″) around the cheeks and jawline to create a slimmer appearance. Use slightly longer lengths (1/2″ to 1″) on the chin to elongate the face. Avoid overly bulky attachments, as they can accentuate roundness. Instead, focus on defined edges and subtle transitions to achieve a more angular, balanced look that complements your natural features.

9.2 Selecting Attachments for Oval and Square Face Shapes

For oval and square face shapes, Wahl attachments can enhance natural symmetry. Oval faces benefit from balanced proportions, so medium-length guide combs (1/4″ to 1/2″) work well to maintain a clean, defined look. Square faces, however, should opt for slightly shorter lengths (1/16″ to 1/4″) to soften sharp angles. Use tapering attachments to create a seamless transition between the beard and neckline. Adjustable guide combs are ideal for customizing lengths, ensuring a polished finish that complements these face shapes effectively.

9.3 Attachment Recommendations for Heart-Shaped Faces

Heart-shaped faces benefit from Wahl attachments that balance broad temples and a narrow chin. Opt for longer guide combs (1/2″ to 3/4″) to elongate the jawline, creating a more balanced look. Tapering attachments are ideal for blending the beard seamlessly into the neckline, softening sharp angles. Adjustable guide combs allow for customization, ensuring the beard complements the face shape. This approach enhances symmetry and creates a harmonious, polished appearance tailored to heart-shaped faces.

Wahl beard trimmer attachments offer unmatched versatility and precision for grooming. Proper selection and maintenance ensure optimal performance, helping achieve the desired beard style with ease and professionalism.

10.1 Summary of Wahl Beard Trimmer Attachments

Wahl beard trimmer attachments provide a comprehensive range of tools for precise grooming. From guide combs to adjustable and close-trimming options, these attachments cater to various beard styles and lengths. They ensure versatility, allowing users to achieve anything from short stubble to long, defined beards with ease.

By offering interchangeable heads and durable materials, Wahl attachments enhance trimming efficiency and customization. Proper maintenance, including cleaning and storage, ensures longevity and optimal performance, making them a valuable investment for any grooming routine.

10.2 Final Tips for Getting the Most Out of Your Attachments

To maximize the potential of your Wahl beard trimmer attachments, always clean and sanitize them regularly. Store attachments in a dry place to prevent rust and ensure longevity. Lubricate blades for smooth operation and replace worn-out parts promptly. Experiment with different guide combs to find the perfect length for your style. For best results, trim in the direction of hair growth and maintain a steady hand. Refer to the size guide and online tutorials for tailored advice, ensuring your beard looks its best at all times.

Additional Resources

Explore Wahl’s official website for detailed parts diagrams and manuals. Visit authorized retailers for genuine replacement attachments. Check online tutorials for expert trimming techniques and product demos.

11.1 Wahl Beard Trimmer Parts Diagram and Manual

The Wahl Beard Trimmer Parts Diagram and Manual provide a comprehensive guide to understanding and maintaining your trimmer. Available on Wahl’s official website, these resources include detailed diagrams and step-by-step instructions for assembling, using, and troubleshooting your trimmer. The manual covers attachment installation, blade maintenance, and safety tips, ensuring you get the most out of your grooming tool. Refer to these materials to learn how to properly care for your trimmer and attachments, as well as how to achieve optimal performance for various beard styles.

11.2 Where to Buy Replacement Attachments

Replacement attachments for Wahl beard trimmers are widely available at authorized retailers like Amazon, Walmart, Best Buy, and the official Wahl website. These platforms offer genuine Wahl products, ensuring compatibility and quality. For convenience, many online stores provide detailed product descriptions, customer reviews, and easy navigation. Additionally, specialty grooming stores and beauty supply outlets often carry Wahl attachments. Always purchase from reputable sources to ensure authenticity and avoid counterfeit products.

11;3 Online Tutorials and Videos for Using Attachments

Online tutorials and videos provide step-by-step guidance for using Wahl beard trimmer attachments effectively. Wahl’s official website and YouTube channel offer detailed instructional videos, while platforms like Amazon and Best Buy feature customer demos. These resources cover topics like attaching guide combs, adjusting lengths, and troubleshooting common issues. Additionally, beauty and grooming blogs often share tips for mastering various beard styles. Watching these tutorials helps users optimize their trimming experience and achieve professional-quality results from home.

ohio candidate requirement guide 2024

The Ohio Candidate Requirement Guide 2024 is a comprehensive resource outlining eligibility, filing processes, deadlines, and compliance requirements for candidates seeking office in Ohio․

1․1 Overview of the Guide

The Ohio Candidate Requirement Guide 2024 provides a detailed roadmap for individuals seeking public office in Ohio, outlining essential steps and regulations․ It covers eligibility criteria, filing procedures, deadlines, and compliance requirements to ensure candidates meet all legal standards․ Designed for both first-time and experienced candidates, the guide simplifies complex election laws, offering clear guidance on forms, fees, and ballot access․ It is updated annually to reflect the latest changes in Ohio’s election processes, making it an indispensable tool for understanding the state’s political landscape and successfully navigating the candidacy process․

1․2 Importance of Meeting Requirements

Meeting the requirements outlined in the Ohio Candidate Requirement Guide 2024 is crucial for ensuring eligibility and compliance with state election laws․ Failure to meet these requirements can result in disqualification, legal challenges, or delays in candidacy․ Adhering to the guidelines ensures candidates are properly vetted and prepared for the responsibilities of public office․ Compliance also maintains the integrity of the electoral process, safeguarding the rights of voters and upholding the trust placed in elected officials․ Accurate and timely submission of documents is essential for a smooth and successful campaign․

Eligibility Criteria for Candidates in Ohio

Candidates must meet specific age, residency, citizenship, voter registration, and party affiliation requirements to qualify for public office in Ohio, as detailed in the guide․

2․1 Age Requirements

In Ohio, age requirements vary by office․ Presidential candidates must be at least 35 years old, while U․S․ Senate and House candidates must be 30 or older․ Statewide office candidates, such as governor, must be 18 years old, and state legislative candidates must also meet this minimum age․ Local candidates may have specific age requirements depending on the office․ These requirements ensure eligibility and readiness for public service, as outlined in the Ohio Candidate Requirement Guide 2024․

2․2 Residency Requirements

In Ohio, residency requirements ensure candidates have a genuine connection to the area they seek to represent․ Presidential candidates must meet national residency criteria, while U․S․ Senate and House candidates must be Ohio residents․ State legislative candidates must reside in their district, and local candidates must meet specific residency rules for their municipality․ These requirements vary by office and are designed to ensure candidates are familiar with the needs of their constituents, as detailed in the Ohio Candidate Requirement Guide 2024․

2․3 Citizenship Requirements

Candidates in Ohio must meet specific citizenship requirements to ensure eligibility for public office․ U․S․ citizenship is mandated for federal and state offices, reflecting loyalty and understanding of governance principles․ Presidential candidates must be natural-born citizens, while other offices require citizenship at the time of filing․ These requirements are fundamental to ensuring candidates align with the nation’s values and legal standards, as outlined in the Ohio Candidate Requirement Guide 2024․

2․4 Voter Registration Requirements

Candidates in Ohio must be registered voters to ensure eligibility for public office․ Voter registration is a foundational requirement, confirming residency and citizenship․ Candidates must register in the county where they reside, meeting deadlines set by the Ohio Secretary of State․ Failure to maintain active voter registration status can disqualify a candidate from appearing on the ballot․ This requirement ensures candidates are engaged citizens and meet the state’s electoral participation standards, as detailed in the guide․ Proper registration is verified during the filing process to maintain election integrity․

2․5 Party Affiliation Requirements

Candidates in Ohio must declare their party affiliation when filing for office, impacting ballot placement and primary election participation․ Party-affiliated candidates must be registered members of their chosen party, while independents remain unaffiliated․ Party affiliation determines access to partisan primary ballots and influences voter perception․ Candidates must maintain their party membership throughout the election cycle to retain ballot eligibility․ This requirement ensures alignment with party values and voter expectations, as outlined in the Ohio Candidate Requirement Guide 2024․

Filing Requirements for Candidates

Candidates in Ohio must submit required forms, meet deadlines, and adhere to legal standards to ensure eligibility and proper placement on the ballot for the 2024 election․

3․1 Necessary Forms and Documents

The Ohio Candidate Requirement Guide 2024 outlines essential forms and documents, including declarations of candidacy, nominating petitions, and financial disclosure statements․ These documents must be accurately completed and notarized to ensure compliance with state election laws․ Candidates are required to submit these forms to the appropriate authorities, such as the Ohio Secretary of State or local county boards, depending on the office sought․ Proper completion and timely submission are crucial for ballot eligibility․

3․2 Filing Deadlines

Candidates in Ohio must adhere to strict filing deadlines to ensure eligibility․ For partisan candidates, the deadline is typically four p․m․ on the ninetieth day before the primary election․ Independent candidates must file by the day before the primary election․ Missing these deadlines results in disqualification․ The Ohio Board of Elections provides detailed timelines and resources to help candidates track and meet these critical dates, ensuring compliance with state election regulations․

3․3 Signature Requirements

Signature requirements in Ohio vary by office and party affiliation․ Independent candidates must collect a specific number of valid signatures, ranging from 2,621 to 7,863, depending on the district and office sought․ Petitions must be properly completed, notarized, and filed by the designated deadline to avoid disqualification․ The Ohio Board of Elections provides detailed guidance to ensure candidates meet these requirements accurately and efficiently, avoiding potential issues with their candidacy․

3․4 Filing Fees

Filing fees in Ohio vary depending on the office sought and are typically a percentage of the salary for that position․ Candidates must pay the required fee when submitting their paperwork․ Fees can be paid by check, cash, or credit card, depending on the filing authority․ Failure to pay the correct fee by the deadline can result in disqualification․ The Ohio Board of Elections provides detailed information on filing fees to ensure candidates meet this requirement accurately and efficiently․

3․5 Submission Process

The submission process involves filing completed paperwork with the appropriate authority, such as the county board of elections or the Ohio Secretary of State․ Candidates must ensure all forms, including petitions and financial disclosures, are properly notarized and submitted by the designated deadline․ Incomplete or late submissions can result in disqualification․ The Ohio Candidate Requirement Guide 2024 provides detailed instructions to help candidates navigate this process efficiently and meet all necessary requirements for successful filing․

Ballot Access Requirements

Ballot access requirements in Ohio outline the necessary steps for candidates to appear on the ballot, including signature petitions, deadlines, and legal compliance to ensure eligibility․

4․1 Types of Candidacy (Partisan, Nonpartisan, Independent)

In Ohio, candidates can run as partisan, nonpartisan, or independent․ Partisan candidates affiliate with a political party, while nonpartisan candidates do not․ Independents run without party support․ Each type has specific filing requirements, such as party affiliation declarations or petition signatures․ Understanding these distinctions is crucial for ballot access, as requirements vary by candidacy type and office sought․ Proper classification ensures compliance with Ohio election laws and regulations․

4․2 Ballot Access Laws

Ohio’s ballot access laws dictate the requirements for candidates to appear on the ballot․ Signature thresholds vary by office and district, with independents facing higher requirements․ Candidates must submit petitions with valid signatures by strict deadlines․ Partisan candidates must affiliate with recognized parties, while nonpartisan candidates do not declare affiliation․ Compliance with these laws ensures proper ballot placement and adherence to state election regulations․ Understanding these rules is essential for successful candidacy in Ohio elections․

4․3 Electoral College and Presidential Candidates

Ohio has 17 electoral votes in the 2024 presidential election, down from 18 in previous cycles․ Presidential candidates must meet specific filing requirements to appear on Ohio’s ballot․ These include submitting paperwork and adhering to deadlines set by state law․ The Electoral College system assigns significant weight to Ohio’s votes, making it a critical state for presidential campaigns․ Candidates must comply with these requirements to ensure participation in the election and compete for Ohio’s electoral votes effectively․

Key Deadlines and Dates for 2024

The 2024 Ohio election cycle includes primary dates, voter registration cutoffs, absentee ballot deadlines, and financial disclosure timelines, all outlined in the candidate requirement guide․

5․1 Primary Election Dates

The 2024 Ohio primary election is set for March 17, 2024․ Candidates must file necessary paperwork by February 6, 2024, to appear on the ballot․ Voter registration for the primary closes on March 3, 2024․ Absentee ballots can be requested beginning January 30, 2024, with early voting starting February 27, 2024․ These dates are critical for candidates and voters to ensure participation in the primary election process․

5․2 Voter Registration Deadlines

In Ohio, the voter registration deadline for the 2024 primary election is March 3, 2024․ Voters must register by this date to participate in the primary․ Registration can be completed online, by mail, or in person at a local election office․ Missing this deadline will prevent voters from casting ballots in the primary․ This ensures all registrations are processed before early voting begins on February 27, 2024․ Absentee ballot requests can also be submitted starting January 30, 2024․

5․3 Absentee and Early Voting Deadlines

Absentee ballot requests in Ohio for the 2024 primary can be submitted starting January 30, 2024․ Early voting begins on February 27, 2024, and runs through March 15, 2024․ Absentee ballots must be postmarked by March 19, 2024, and received by the board of elections by March 22, 2024․ In-person early voting ends at 2 p․m․ on March 15, 2024․ These deadlines ensure voters can participate in the primary election effectively․

5․4 Financial Disclosure Deadlines

Financial disclosure statements for candidates in Ohio are due on or before the 15th day of the month following the filing deadline for their candidacy․ For the 2024 primary election, disclosures must be filed by April 15, 2024․ Candidates must submit these statements to the appropriate county or state election authorities․ Failure to meet this deadline may result in penalties․ This ensures transparency and accountability in campaign finance, aligning with Ohio’s election integrity standards․

Campaign Finance Requirements

Campaign finance requirements in Ohio include disclosure obligations, contribution limits, and reporting deadlines to ensure transparency and compliance with state election laws․

6․1 Disclosure Requirements

Candidates in Ohio must disclose financial contributions, expenditures, and personal financial interests to maintain transparency․ Disclosure statements must include sources of funding, amounts received, and how funds are spent․ Candidates are required to file these disclosures periodically, with specific deadlines outlined in the guide․ Failure to comply with disclosure requirements can result in penalties or legal action․ These regulations ensure accountability and public trust in the electoral process․

6․2 Contribution Limits

Candidates in Ohio must adhere to specific contribution limits to ensure fair and transparent campaigning․ Limits vary based on the office sought, with higher caps for statewide races․ Contributions from individuals, PACs, and political parties are capped to prevent undue influence․ Self-financing by candidates is allowed but subject to reporting․ Corporations and labor unions are prohibited from direct contributions․ These limits aim to maintain balanced competition and prevent excessive financial influence in elections, promoting a level playing field for all candidates․

6․3 Reporting Deadlines

Candidates and campaigns in Ohio must adhere to strict reporting deadlines to maintain compliance with campaign finance laws․ Key deadlines include January 31, June 30, and October 20 for annual and semi-annual reports․ Pre-election reports are due 12 days before primary and general elections․ Quarterly filings are required for active campaigns․ Late contribution reports must be filed within 24 hours of receiving contributions over $1,000․ Missing deadlines can result in penalties or disqualification, emphasizing the importance of accurate and timely reporting․

6․4 Prohibited Practices

Candidates and campaigns in Ohio must avoid prohibited practices, including accepting contributions exceeding legal limits, using campaign funds for personal expenses, and falsifying financial reports․ Soliciting or accepting corporate contributions is also prohibited․ Candidates cannot knowingly accept contributions from illegal sources or misrepresent their campaign finances․ Violations of these rules can lead to legal penalties, fines, or disqualification from the election․ Adherence to these restrictions ensures integrity and transparency in Ohio’s electoral process․

Ohio Judicial Candidate Requirements

Judicial candidates in Ohio must meet specific eligibility criteria, including legal and residency requirements․ They must adhere to conduct rules and file specialized forms for judicial office․

7․1 Eligibility for Judicial Offices

Judicial candidates in Ohio must meet strict eligibility criteria, including being licensed attorneys with at least six years of legal experience․ They must be at least 30 years old and reside in the judicial district they seek to represent․ Candidates must also comply with Ohio’s judicial conduct rules and submit specific forms as outlined in the Ohio Candidate Requirement Guide 2024․ This ensures they are qualified and adhere to ethical standards for judicial office․

7․2 Conduct Rules for Judicial Campaigns

Judicial candidates in Ohio must adhere to strict conduct rules to maintain impartiality and integrity․ They are prohibited from making campaign promises about specific cases or rulings․ Candidates must avoid conflicts of interest and ensure their campaigns comply with ethical standards․ The Ohio Board of Professional Conduct oversees these rules, emphasizing fairness and transparency; Compliance with these guidelines is essential to uphold the integrity of the judiciary and ensure public trust in the electoral process for judicial offices․

7․3 Specific Forms and Filings

Judicial candidates in Ohio must submit specific forms, including a declaration of candidacy and nominating petitions․ These documents must be filed with the Ohio Secretary of State or local election officials, depending on the jurisdiction․ Candidates are required to meet signature thresholds and ensure petitions are properly notarized․ Financial disclosure statements may also be mandatory․ Failing to meet these filing requirements can result in disqualification․ The Ohio Board of Elections provides detailed guidance on the necessary forms and submission processes to ensure compliance․

Local and Municipal Candidate Requirements

Local and municipal candidates in Ohio must meet specific eligibility criteria, complete filing processes, and gather required signatures to qualify for the ballot․ Deadlines and compliance with local regulations are critical to ensure candidacy validation․

8․1 Eligibility Criteria for Local Offices

Candidates for local offices in Ohio must meet specific eligibility criteria, including residency requirements, voter registration, and age restrictions․ Each local office may have unique residency rules, but candidates generally must reside within the jurisdiction they seek to represent․ They must be registered voters in Ohio and meet minimum age requirements, typically 18 years old․ Citizenship and other legal qualifications, such as not being convicted of certain felonies, are also essential․ These criteria ensure candidates are qualified to serve their communities effectively․

8․2 Filing Processes for Municipal Candidates

Municipal candidates in Ohio must complete specific filing steps to appear on the ballot․ This includes submitting a Declaration of Candidacy and nominating petitions with the required number of valid signatures․ Filing fees vary by office and must be paid at the time of submission․ Candidates must meet deadlines set by the Ohio Board of Elections to ensure their paperwork is processed․ Properly notarized petitions and completed forms are essential to avoid disqualification․

8․3 Signature Requirements for Local Ballots

Local candidates in Ohio must gather a specific number of valid signatures to qualify for the ballot․ Signature requirements vary by office and district, with some races requiring as few as 262 or as many as 786 valid signatures․ Petitions must be properly completed, notarized, and submitted by the designated deadline to ensure eligibility․ The Ohio Board of Elections provides detailed guidelines to help candidates navigate the signature collection process successfully․

Role of the Ohio Board of Elections

The Ohio Board of Elections oversees election processes, ensuring compliance with state laws․ It provides resources and support for candidates to navigate filing, deadlines, and campaign finance requirements․

9․1 Responsibilities in Candidate Filing

The Ohio Board of Elections manages candidate filings, verifying eligibility and ensuring compliance with legal requirements․ It processes documents, checks signatures, and maintains accurate records․ The Board also provides guidance and resources to candidates, ensuring they meet all deadlines and filing procedures․ This support helps candidates successfully navigate the electoral process and appear on the ballot․ The Board’s role is crucial for the integrity and efficiency of Ohio’s elections․

9․2 Resources for Candidates

The Ohio Board of Elections offers candidate handbooks, guides, and informational packets to assist with filing processes and compliance․ These resources include detailed instructions, forms, and timelines․ Candidates can access materials like the Joint Legislative Ethics Committee guidelines and Major Party Candidate information․ Additionally, the Board provides online resources and direct support to help candidates understand and meet all requirements effectively, ensuring a smooth and informed experience throughout the election process․

9․3 Support for Campaign Compliance

The Ohio Board of Elections provides robust support to ensure campaign compliance, offering guidance on financial disclosures, reporting deadlines, and ethical practices․ Candidates receive access to detailed handouts, legal advisories, and training materials․ The Board also collaborates with the Joint Legislative Ethics Committee to address complex compliance issues․ This support ensures transparency, accountability, and adherence to state election laws, helping candidates maintain integrity throughout their campaigns․ Resources are readily available on the Board’s website and through local election offices․

Presidential Candidate Requirements in Ohio

Presidential candidates in Ohio must meet specific filing requirements, deadlines, and legal standards to appear on the ballot․ The state allocates 17 electoral votes, making it a key battleground․

10․1 Electoral Votes and Importance

Ohio is allocated 17 electoral votes in the 2024 presidential election, a reduction from 18 in previous cycles due to congressional reapportionment․ These votes play a critical role in the Electoral College system, which determines the presidency․ Ohio’s electoral votes are significant, as they can heavily influence the election outcome․ Candidates must secure a majority of these votes to win the state, making Ohio a key battleground․ Historically, Ohio’s electors have consistently voted as pledged, ensuring reliability for candidates․

10․2 Filing Requirements for Presidential Candidates

Presidential candidates in Ohio must file specific documents, including a Declaration of Candidacy and nominating petitions․ These petitions require a certain number of signatures from registered Ohio voters, varying by district․ Candidates must submit these documents to the Ohio Secretary of State’s office by designated deadlines to ensure ballot access․ Additional filing fees may apply, depending on the office sought․ The 2024 Ohio Candidate Requirement Guide provides detailed instructions and deadlines for presidential candidates to meet these requirements effectively․

10․3 Deadlines for Presidential Candidates

Presidential candidates in Ohio must adhere to strict filing deadlines to secure ballot access․ The primary deadline for submitting nominating petitions and declarations of candidacy is typically in early spring․ Independent candidates must file by a designated date to ensure their names appear on the ballot․ Missing these deadlines results in exclusion from the election․ The 2024 Ohio Candidate Requirement Guide outlines all critical dates, ensuring candidates meet the necessary timelines for successful participation․

Additional Resources and Guides

The 2024 Ohio Candidate Requirement Guide, Local Candidates Guide to Campaign Finance, and Secretary of State Prescribed Forms provide essential tools for navigating election processes successfully․

11․1 Ohio Candidate Requirement Guide 2024

The 2024 Ohio Candidate Requirement Guide provides detailed information on filing requirements, necessary forms, deadlines, and fees for candidates․ It serves as a concise resource to help individuals navigate the legal and procedural aspects of running for office in Ohio․ The guide is available on the Ohio Board of Elections website and is essential for ensuring compliance with all state-specific regulations․ By following this guide, candidates can efficiently meet the requirements to appear on the ballot and successfully manage their campaigns․

11․2 Local Candidates Guide to Campaign Finance

The Local Candidates Guide to Campaign Finance offers tailored guidance for municipal and local office seekers in Ohio․ It outlines disclosure requirements, contribution limits, and reporting deadlines specific to local campaigns․ The guide helps candidates understand financial regulations, ensuring transparency and compliance with state laws․ By adhering to these guidelines, local candidates can maintain ethical standards and focus on their campaign goals effectively․ This resource is essential for navigating the financial aspects of local elections in Ohio․

11․3 Secretary of State Prescribed Forms

The Secretary of State Prescribed Forms are official documents required for candidate filing in Ohio․ These forms ensure compliance with legal standards and provide clarity on submission processes․ They include declarations of candidacy, nominating petitions, and financial disclosure statements․ Candidates must complete these forms accurately and submit them by designated deadlines to avoid disqualification․ The forms are available on the Ohio Board of Elections website, serving as a critical resource for candidates to meet all legal requirements effectively․

21 day fasting guide

21-day fasting is a prolonged fasting regimen lasting 21 consecutive days‚ often involving water fasting. It aims to promote deep physical‚ mental‚ and spiritual rejuvenation by enhancing autophagy‚ improving metabolism‚ and increasing mental clarity. However‚ the regimen carries risks such as nutrient deficiencies and dehydration. It is vital to consult a healthcare provider before starting to ensure safety and suitability.

What is Fasting?

Fasting is the practice of abstaining from food and sometimes drinks for a specified period. It can involve complete abstinence (water fasting) or modified approaches like juice fasting. The duration varies‚ from short periods to extended fasting like 21 days. Fasting is often used for weight loss‚ metabolic health‚ or spiritual reasons. Different methods include alternate-day fasting and time-restricted eating. Fasting aims to promote physiological and mental renewal through caloric restriction and metabolic adaptation. Consulting a healthcare provider is crucial before starting any fasting regimen.

Purpose and Goals of a 21-Day Fast

The primary purpose of a 21-day fast is to achieve significant weight loss‚ improve metabolic health‚ and enhance mental clarity. It aims to reset eating habits‚ promote autophagy‚ and reduce inflammation. Many individuals undertake this fast to address chronic health conditions‚ such as insulin resistance or high blood lipids. The extended duration allows for deeper physiological changes compared to shorter fasts. However‚ it requires careful preparation and medical supervision to minimize risks and ensure safe‚ effective outcomes. Proper planning is essential for success.

Health Benefits of 21-Day Fasting

21-day fasting promotes weight loss‚ improves metabolism‚ and enhances autophagy. It reduces inflammation‚ improves blood lipids‚ and insulin sensitivity‚ boosting mental clarity and reducing chronic disease risks.

Weight Loss and Improved Metabolism

21-day fasting accelerates weight loss by creating a calorie deficit and enhancing fat breakdown. It boosts metabolism‚ increasing energy expenditure and fat oxidation. Studies show improved metabolic health‚ with better insulin sensitivity and reduced blood lipids‚ lowering the risk of chronic diseases like diabetes and heart conditions. However‚ maintaining weight loss post-fast requires a balanced diet and regular physical activity to sustain metabolic benefits.

Enhanced Autophagy and Cellular Renewal

21-day fasting significantly enhances autophagy‚ the body’s natural process of recycling and removing damaged cells and proteins. Prolonged fasting stimulates cellular renewal by promoting the breakdown and reuse of dysfunctional components‚ leading to improved cellular health. This process can rejuvenate organs‚ reduce oxidative stress‚ and lower the risk of age-related diseases. Additionally‚ fasting increases production of human growth hormone‚ further supporting tissue repair and regeneration‚ making it a powerful tool for overall health optimization.

Improved Blood Lipids and Insulin Sensitivity

21-day fasting significantly improves blood lipid profiles by reducing LDL cholesterol and triglycerides while increasing HDL cholesterol. Extended fasting enhances insulin sensitivity‚ lowering insulin levels and improving glucose uptake in cells. This reduction in insulin resistance can help manage or prevent type 2 diabetes. Additionally‚ fasting decreases visceral fat‚ further benefiting metabolic health. These changes contribute to better cardiovascular health and reduced risk of chronic diseases‚ making fasting a valuable approach for improving metabolic function and overall well-being.

Mental Clarity and Reduced Inflammation

21-day fasting enhances mental clarity by increasing the production of brain-derived neurotrophic factor (BDNF)‚ improving focus and cognitive function. Extended fasting reduces systemic inflammation by suppressing pro-inflammatory cytokines‚ which can alleviate conditions like arthritis and improve immune response. The brain also benefits from reduced inflammation‚ potentially lowering the risk of neurodegenerative diseases. Fasting’s detoxifying effects further promote mental and physical well-being‚ making it a powerful tool for both brain health and overall vitality.

Risks and Precautions

21-day fasting carries potential health risks‚ including nutrient deficiencies‚ dehydration‚ and electrolyte imbalances. It may also negatively impact hormones and metabolism in certain individuals. Consulting healthcare professionals is crucial to mitigate these risks and ensure safe fasting practices.

Potential Nutrient Deficiencies

Extended fasting can lead to deficiencies in essential vitamins and minerals. Studies show fasting individuals‚ particularly women‚ may lack sufficient vitamins B1‚ B3‚ B5‚ and B6. Prolonged fasting can also impair the absorption of critical minerals like magnesium and calcium. These deficiencies may cause fatigue‚ weakened immunity‚ and other health issues. Supplementation and careful planning are crucial to maintain nutritional balance during a 21-day fast‚ ensuring overall well-being and preventing long-term health complications.

Dehydration and Electrolyte Imbalance

21-day fasting can lead to dehydration and electrolyte imbalances‚ as the body loses water and essential minerals like sodium‚ potassium‚ and magnesium. Even with water intake‚ fasting depletes electrolytes‚ potentially causing dizziness‚ fatigue‚ and heart arrhythmias. Monitoring hydration levels and considering electrolyte supplementation is crucial. Severe imbalances may require medical intervention. Proper hydration strategies and professional guidance are essential to mitigate these risks during prolonged fasting.

Adverse Effects on Hormones and Metabolism

21-day fasting can disrupt hormone levels‚ particularly for women‚ affecting leptin and insulin sensitivity. Prolonged fasting may slow metabolism‚ as the body conserves energy‚ potentially leading to fat retention post-fast. While benefits like improved blood lipids exist‚ risks like hormonal imbalances and metabolic slowdowns are significant. Professional guidance is crucial to mitigate these effects‚ especially for individuals with pre-existing metabolic or hormonal conditions.

Consulting Healthcare Professionals

Consulting a healthcare professional is crucial before starting a 21-day fast‚ especially for individuals with pre-existing medical conditions. They can assess health risks‚ recommend personalized fasting plans‚ and monitor progress. A healthcare provider can help identify potential nutrient deficiencies‚ hormonal imbalances‚ and metabolic changes. Regular check-ups ensure safety and address any adverse effects promptly. Starting without professional guidance‚ particularly for extended fasting‚ can lead to severe complications. Professional oversight is essential for a safe and beneficial fasting experience.

Preparing for a 21-Day Fast

Preparing for a 21-day fast involves mental and physical readiness‚ setting clear goals‚ and consulting a nutritionist. Gradual dietary adjustments and hydration are essential for a smooth transition;

Mental and Physical Preparation

Mental preparation involves setting clear intentions and understanding the challenges of a 21-day fast. Physically‚ gradually reducing calorie intake and eliminating processed foods can minimize side effects. Staying hydrated and ensuring electrolyte balance is crucial. Consulting a healthcare provider is essential to address any health concerns. Building a support system and maintaining a positive mindset can significantly impact the success of the fasting journey. Proper preparation ensures a safer and more effective fasting experience.

Setting Realistic Goals and Expectations

Setting realistic goals is crucial for a successful 21-day fast. Define clear objectives‚ such as weight loss‚ improved health‚ or spiritual growth. Understand that results vary based on individual factors like metabolism and adherence. Manage expectations by recognizing that fasting may not solve all health issues instantly. Be prepared for challenges and celebrate small achievements. Consulting a healthcare provider can help tailor goals to your needs. A well-planned approach ensures a more focused and rewarding fasting experience.

Consulting a Nutritionist or Healthcare Provider

Consulting a nutritionist or healthcare provider is essential before starting a 21-day fast. They evaluate your health status‚ discuss potential risks‚ and create a personalized fasting plan. A professional can help identify underlying conditions that may contraindicate prolonged fasting. They also provide guidance on nutrient intake‚ hydration‚ and electrolyte balance‚ ensuring a safer fasting experience. Regular monitoring and adjustments based on professional advice can enhance the benefits and minimize potential harm during your fasting journey.

Fasting Plans and Methods

Popular fasting methods include water fasting‚ modified fasting with juice or broth‚ and alternate-day fasting. Each method suits different needs and durations‚ promoting unique benefits and challenges.

Water Fasting: Benefits and Risks

Water fasting involves consuming only water for 21 days‚ promoting weight loss‚ improved blood lipids‚ and enhanced autophagy. However‚ risks include severe dehydration‚ electrolyte imbalances‚ and potential muscle loss. Proper medical supervision is crucial to mitigate these risks and ensure safety during prolonged fasting periods.

Modified Fasting with Juice or Broth

Modified fasting involves consuming only juices or broths during the 21-day period‚ providing essential nutrients while minimizing calorie intake. This method reduces hunger and supports detoxification. However‚ it risks nutrient imbalances if not properly planned. Benefits include improved digestion and sustained energy levels. Consulting a healthcare provider is crucial to tailor the plan and avoid complications. This approach is less restrictive than water fasting but still requires careful monitoring to ensure safety and effectiveness.

Alternate-Day Fasting: A Gentler Approach

Alternate-day fasting (ADF) is a flexible fasting method where individuals alternate between days of unrestricted eating and days of calorie restriction or fasting. This approach is considered gentler than prolonged fasting‚ making it more sustainable for some. ADF has been shown to promote significant weight loss‚ improve blood lipid profiles‚ and reduce inflammation. However‚ it may not be suitable for everyone‚ particularly women‚ as it can disrupt hormones. Consulting a healthcare provider before starting is recommended to ensure safety and suitability.

Daily Routine During the Fast

A daily routine during fasting includes morning hydration‚ midday rest‚ and evening reflection. Monitor physical condition and adjust plans to maintain health and safety.

Morning Routine: Hydration and Monitoring

Start your day with water or herbal tea to replenish fluids. Monitor electrolyte levels and vital signs like heart rate and blood pressure. Track hydration status and energy levels. Adjust hydration strategies to prevent dehydration. Listen to your body and modify your fasting plan if necessary. Ensure a balanced approach to maintain health and safety throughout the fast.

Midday Routine: Rest and Relaxation

During the midday‚ prioritize rest and relaxation to conserve energy. Engage in calming activities like reading or meditation to reduce stress. Ensure a peaceful environment to support mental clarity. Avoid strenuous activities to prevent fatigue. Consider lying down or taking a short nap if needed. Proper rest helps maintain balance and supports overall well-being during the fasting period.

Evening Routine: Reflection and Preparation

In the evening‚ focus on unwinding and reflecting on your progress. Engage in light activities like meditation or journaling to calm your mind. Ensure you stay hydrated by sipping water or herbal teas. Prepare for the next day by setting intentions and planning your routine. Avoid strenuous tasks and prioritize rest to maintain energy levels. Reflection helps in staying motivated and mentally prepared for the fasting journey ahead.

Nutrition and Rehydration After the Fast

Post-fast nutrition focuses on gradual rehydration and reintroducing nutrient-rich foods to restore balance and support recovery. Prioritize water‚ herbal teas‚ and electrolyte-rich beverages to replenish fluids.

Breaking the Fast: Reintroducing Foods

Breaking a 21-day fast requires careful reintroduction of foods to avoid digestive discomfort. Start with small portions of bland‚ nutrient-rich foods like steamed vegetables‚ lean proteins‚ and whole grains. Avoid heavy or processed meals initially. Gradually incorporate a variety of foods over several days to allow the digestive system to adjust. Prioritize hydration with water and electrolyte-rich beverages to prevent dehydration. Monitoring health markers and consulting a healthcare provider can ensure a safe transition back to normal eating habits.

Post-Fast Nutrition: Balancing Macronutrients

After a 21-day fast‚ it’s crucial to balance macronutrients to restore energy and support recovery. Prioritize whole‚ nutrient-dense foods like lean proteins‚ healthy fats‚ and complex carbohydrates. Incorporate fruits‚ vegetables‚ and whole grains to replenish vitamins and minerals. Aim for a balanced ratio of protein (25-30%)‚ fats (40-50%)‚ and carbs (30-40%) to stabilize metabolism and prevent nutrient deficiencies. Avoid processed foods and sugars to maintain metabolic health and sustain weight loss benefits.

Hydration Strategies: Avoiding Dehydration

Proper hydration is critical during and after fasting to prevent dehydration. Drink plenty of water throughout the day‚ aiming for at least 8-10 glasses. Incorporate electrolyte-rich beverages to replenish lost salts and minerals. Monitor urine color; pale yellow indicates adequate hydration. Avoid sugary drinks and caffeine‚ which can dehydrate the body. Post-fast‚ gradually introduce hydrating foods like watermelon‚ cucumbers‚ and herbal teas to support rehydration and maintain fluid balance.

Monitoring Progress and Adjustments

Monitoring progress involves tracking weight loss‚ body composition‚ and blood markers. Adjustments to the fasting plan may be necessary based on individual results to ensure safety and effectiveness.

Tracking Weight Loss and Body Composition

Tracking weight loss and body composition during a 21-day fast involves regular measurements using a scale and body fat calipers. Weekly weigh-ins help monitor progress‚ while progress photos provide visual insights. It’s important to measure fat percentage and muscle mass to ensure fat loss rather than muscle loss. Tracking also helps identify plateaus‚ allowing for adjustments to the fasting plan. Consistency and accuracy in measurements are key to understanding the effectiveness of the fast on body composition and overall health.

Monitoring Blood Markers and Health Metrics

Monitoring blood markers during a 21-day fast is crucial to assess metabolic changes and ensure safety. Key metrics include blood glucose levels‚ ketones‚ cholesterol‚ and electrolytes. Regular blood tests can reveal improvements in insulin sensitivity‚ reduced inflammation‚ and enhanced lipid profiles. However‚ prolonged fasting may also lead to nutrient deficiencies or electrolyte imbalances; Tracking these metrics helps identify potential risks and ensures the fasting plan is adjusted to maintain optimal health and safety throughout the 21-day period.

Adjusting the Fasting Plan Based on Results

During a 21-day fast‚ it’s crucial to monitor progress and adjust the plan as needed. If weight loss plateaus or health metrics like blood glucose or electrolytes become imbalanced‚ consider modifying the fasting method. For instance‚ switching from water fasting to a modified plan with juices or broths can help replenish nutrients. Consulting a healthcare provider is essential to address any adverse effects and tailor the approach for better outcomes. Adjustments ensure safety and maximize benefits throughout the fasting period.

Common Challenges and Solutions

Common challenges during a 21-day fast include dehydration‚ hunger‚ and hormonal shifts. Solutions involve staying hydrated‚ managing cravings‚ and consulting healthcare professionals for adjustments regularly.

Hunger and Cravings: Managing Them Effectively

Hunger and cravings are common during prolonged fasting. Staying hydrated with water and electrolytes can reduce hunger pangs. Distracting oneself with activities like exercise or meditation helps. Consuming broth or herbal teas may also alleviate cravings. Planning meals for post-fast can mentally prepare individuals to endure hunger. Professional guidance is crucial to manage cravings safely and effectively during the 21-day fasting period.

Fatigue and Low Energy: Strategies to Overcome

Fatigue and low energy are common during prolonged fasting. Staying hydrated with water and electrolytes helps maintain energy levels. Resting adequately and avoiding strenuous activities can prevent exhaustion. Engaging in mild exercise‚ like short walks‚ may boost energy. Listening to your body and adjusting your fasting plan if needed is crucial. Prioritizing sleep and managing stress through relaxation techniques can also help combat fatigue effectively during the fasting period.

Dizziness and Lightheadedness: Prevention Tips

To prevent dizziness and lightheadedness during fasting‚ stay hydrated with water and electrolyte-rich beverages. Avoid sudden movements and rest when symptoms occur. Eat small‚ balanced meals before fasting to stabilize blood sugar. Incorporate relaxation techniques like deep breathing to manage stress. Ensure adequate sleep and avoid overexertion. If dizziness persists‚ consider consulting a healthcare provider to rule out underlying issues. Prioritize your health and adjust your fasting plan if necessary to maintain well-being.

Long-Term Benefits and Maintenance

21-day fasting can lead to sustained weight loss‚ enhanced metabolic health‚ and improved mental clarity. Incorporating intermittent fasting long-term supports balanced eating habits and overall well-being.

Sustaining Weight Loss and Metabolic Health

After completing a 21-day fast‚ maintaining weight loss and metabolic health requires a balanced diet and regular intermittent fasting. Incorporating nutrient-rich meals and staying hydrated supports long-term metabolic benefits. Post-fast‚ focus on whole foods‚ lean proteins‚ and healthy fats to stabilize weight and improve insulin sensitivity. Consistent healthy habits‚ combined with periodic fasting‚ can enhance metabolic function and promote sustained weight management.

Maintaining Healthy Eating Habits Post-Fast

Post-fast‚ reintroduce nutrient-dense foods gradually to avoid digestive discomfort. Emphasize whole grains‚ fruits‚ vegetables‚ lean proteins‚ and healthy fats to build a balanced diet. Avoid processed foods and sugars to maintain metabolic health. Incorporate mindful eating practices‚ such as smaller portions and regular meals‚ to prevent overeating. Staying hydrated and listening to your body’s hunger cues supports long-term healthy eating habits and overall well-being after the fasting period.

Incorporating Intermittent Fasting Long-Term

After completing a 21-day fast‚ incorporating intermittent fasting (IF) long-term can sustain weight loss and metabolic health. Popular methods include 16:8 or 5:2 plans‚ which are easier to maintain. IF helps regulate blood lipids‚ improves insulin sensitivity‚ and enhances autophagy. However‚ consistency and listening to your body are key. Tailor your approach to fit your lifestyle and health goals‚ ensuring it aligns with your nutritional needs. Regular consultation with a healthcare provider can help refine your strategy for long-term success.

21-day fasting can be a transformative experience‚ offering significant physical and mental benefits. However‚ it requires careful planning and professional guidance to ensure safety and effectiveness.

Final Thoughts on 21-Day Fasting

21-day fasting can yield profound benefits‚ such as weight loss‚ improved metabolism‚ and enhanced mental clarity. However‚ it carries risks like nutrient deficiencies and dehydration. Success depends on careful preparation‚ professional guidance‚ and a gradual reintegration of foods post-fast. While the results can be transformative‚ it’s essential to approach this regimen responsibly‚ ensuring it aligns with individual health goals and lifestyles. Always prioritize health and safety to maximize the positive outcomes of this extended fasting period.

Encouragement for a Healthy Lifestyle

Embracing a healthy lifestyle beyond fasting is key to sustaining the transformative benefits of your 21-day journey. Prioritize hydration‚ balanced nutrition‚ and mindful eating to maintain weight loss and metabolic health. Incorporate regular physical activity and stress management to enhance overall well-being. Remember‚ small‚ consistent changes lead to lasting results. Stay committed to your health goals‚ and let your fasting experience be the foundation of a vibrant‚ healthier life moving forward.

party cake cutting guide

Mastering the art of party cake cutting ensures even portions and a polished presentation‚ making your celebration memorable. This guide covers essential tools‚ techniques‚ and tips for slicing cakes of all shapes and sizes perfectly.

Why Proper Cake Cutting Matters at Parties

Proper cake cutting is essential for ensuring equal portions‚ maintaining presentation‚ and enhancing the overall guest experience. A well-cut cake not only looks appealing but also prevents waste and ensures everyone enjoys a fair share. Even slices contribute to a polished presentation‚ making your event more professional and memorable. Additionally‚ proper cutting techniques help avoid messy servings‚ which can be unhygienic and unattractive. It also ensures that the cake’s design remains intact‚ preserving its aesthetic appeal. Proper cake cutting is especially crucial for large gatherings‚ where efficiency and fairness are key. By mastering the art of cake cutting‚ hosts can create a seamless and enjoyable experience for their guests‚ making the celebration even more special and stress-free. Investing time in learning proper techniques guarantees satisfaction and leaves a lasting impression on your guests.

Tools and Equipment Needed

A serrated knife‚ cake stand‚ and serving utensils are essential for efficient cake cutting. Optional tools like cake cutters or turntables can enhance precision and presentation‚ ensuring even portions and safety.

Essential Tools for Cutting a Party Cake

A serrated knife is the primary tool for cutting cakes‚ as it glides smoothly through layers without tearing. A cake stand or serving plate provides stability and makes slicing easier. Serving utensils like a cake server or spatula are crucial for portioning and transferring slices. Optional but helpful tools include a cake cutter or slicer for even portions and a turntable for easy access to all sides. Measuring guides can ensure consistency in slice sizes. For tiered cakes‚ a long‚ sharp knife or cake saw is recommended. Always sharpen knives before use for clean cuts and safety. Sanitize all tools beforehand to maintain hygiene. These tools collectively ensure efficient‚ precise‚ and safe cake cutting for any celebration.

Optional but Helpful Tools

While essential tools are must-haves‚ optional tools can enhance your cake-cutting experience. A cake cutter or slicer ensures even‚ uniform slices‚ while a turntable allows easy access to all sides. For tiered cakes‚ a long‚ sharp knife or cake saw is ideal for clean cuts between layers. A portion guide or template helps achieve consistent slice sizes‚ especially for large gatherings. A serving tongs or fork can assist in portioning and serving without damaging the cake. Additionally‚ a cake server with a serrated edge is perfect for lifting and transferring slices. These tools‚ though not essential‚ can streamline the process‚ reduce waste‚ and improve presentation for a professional touch. They are particularly useful for large events or intricate cake designs‚ ensuring efficiency and precision when serving guests; Incorporating these optional tools can elevate your cake-cutting skills and make the task more enjoyable;

Maintenance and Safety Tips for Cutting Tools

Maintaining and safely handling cake-cutting tools is crucial for longevity and efficiency. Always clean blades thoroughly after use to prevent icing and crumbs from hardening. Regular sharpening ensures smooth cuts and prevents the knife from tearing the cake. Store tools in a dry place to avoid rust and dulling. Safety is paramount; handle sharp blades with care‚ keeping fingers away from the cutting edge. Use a blade guard or protective sleeve when storing or transporting knives. For electric tools‚ like cake saws‚ ensure they are unplugged when not in use. Proper maintenance and safety practices not only protect your tools but also prevent accidents‚ ensuring a smooth and enjoyable cake-cutting experience for all. By following these tips‚ you can extend the life of your tools and maintain precision in every cut.

Planning the Cake Cutting

Assess the number of guests and determine the cake size accordingly. Estimate slices based on portion preferences‚ adjusting widths for party or wedding servings to ensure everyone enjoys an equal share.

Determining the Number of Guests

Determining the number of guests is the first step in planning a successful cake cutting. Knowing the guest count allows you to choose the right cake size. For example‚ a 6-inch cake typically serves 5-6 slices‚ while an 8-inch cake serves 8-12 slices. Larger cakes‚ such as 10-inch or 12-inch‚ can serve 20-24 or 28-32 guests‚ respectively. Consider the serving style—party slices are usually larger‚ while wedding slices are smaller and more precise. Adjust the cake size based on these factors to ensure everyone gets a fair share. Using a cake cutting guide can help visualize how to divide the cake evenly. By accurately assessing your guest list‚ you can avoid having too little or too much cake‚ making your event both enjoyable and stress-free. Proper planning ensures a smooth and efficient cake-cutting process at any celebration.

Estimating the Number of Slices

Estimating the number of slices is crucial for ensuring every guest receives a fair portion. The size of the cake significantly influences the number of slices. A 6-inch cake typically yields 5-6 slices‚ while an 8-inch cake can serve 8-12 guests. For larger gatherings‚ a 10-inch cake serves 20-24 people‚ and a 12-inch cake accommodates 28-32 slices. The serving style also impacts slice count—party slices are generally larger‚ while wedding slices are smaller and more uniform. To maximize slices‚ consider cutting methods like triangular wedges or grid patterns. Using tools like a sharp knife and cake server ensures clean cuts. Adjust slice width based on cake height: wider slices for taller cakes (3-5 inches) and narrower for shorter ones. Marking the cake before cutting helps achieve even portions; Refer to portion guides‚ such as 2×2 inches for parties and 1×1 inches for weddings‚ to estimate accurately. This systematic approach guarantees consistent and impressive results for any celebration.

Techniques for Cutting Different Cake Types

Mastering various cake-cutting techniques ensures precise and even portions for round‚ square‚ tiered‚ shaped‚ and small cakes. Each type requires specific methods to achieve perfect slices effortlessly and elegantly.

How to Cut Round Cakes

Round cakes are a popular choice for parties due to their symmetrical appeal. To cut a round cake evenly‚ start by marking the icing with a knife to guide your slices. Place the cake on a turntable or flat surface and use a serrated knife for clean cuts. Begin by slicing from the top down‚ applying gentle pressure. For uniform portions‚ aim for 1-2 inch wide slices. After each cut‚ wipe the knife to prevent crumbs from transferring. For an 8-inch cake‚ expect 8-12 slices‚ while larger cakes yield more portions. To enhance presentation‚ arrange slices on a serving platter or individual plates. This method ensures consistent serving sizes and a polished look for your event.

How to Cut Square or Rectangular Cakes

Cutting square or rectangular cakes is straightforward and efficient‚ ensuring even portions for your guests. Begin by placing the cake on a flat‚ stable surface. Use a serrated knife to make clean‚ precise cuts. For uniform slices‚ mark the cake top with a knife or skewer to guide your cuts. Start by cutting the cake into a grid pattern‚ dividing it into equal rows and columns based on the desired portion size. For larger cakes‚ cut vertically first‚ then horizontally‚ to create uniform rectangles. Party slices are typically 1×2 inches‚ while wedding slices are 1×1 inches. To avoid crumbling‚ apply gentle pressure and wipe the knife between cuts. This method ensures consistent serving sizes and an attractive presentation. Arrange the slices on a platter or individual plates for a polished look. Proper cutting enhances the overall appeal of your celebration.

How to Cut Tiered Cakes

Cutting tiered cakes requires precision and care to maintain their structural integrity and ensure even portions. Start by placing the cake on a sturdy stand or table. Use a serrated knife to make clean‚ vertical cuts through each tier. For stability‚ cut one tier at a time‚ working from the bottom up. Mark the top of each tier with a knife or skewer to guide your cuts evenly. Begin by slicing the bottom tier into the desired portion sizes‚ typically 1×2 inches for party slices or 1×1 inches for wedding portions. Use a cake server or spatula to carefully lift and transfer slices to plates. For upper tiers‚ repeat the process‚ ensuring each tier is fully cut before moving to the next. This method prevents collapse and ensures a professional presentation. Always wipe the knife between cuts to avoid transferring crumbs or frosting.

How to Cut Shaped Cakes

Cutting shaped cakes requires a strategic approach to maintain their decorative appeal while ensuring even portions. Start by identifying the cake’s shape‚ such as a heart‚ circle‚ or rectangle‚ and plan your cuts accordingly. Use a serrated knife for clean‚ precise slices. For intricate designs‚ mark the cake with a skewer or knife to guide your cuts. Begin by slicing along the shape’s natural symmetry‚ such as cutting a heart cake from top to bottom. For round or square shaped cakes‚ cut evenly spaced radial slices‚ similar to a pie. To avoid damaging the design‚ apply gentle pressure and wipe the knife between cuts. For smaller shapes‚ like cupcakes‚ use a smaller knife or cookie cutter to portion out individual servings. Always serve with a cake server or spatula to preserve the cake’s appearance and ensure smooth presentation.

How to Cut Small Cakes or Cupcakes

Cutting small cakes or cupcakes is straightforward but requires attention to detail for uniform portions. Start by placing the cake on a flat surface. For cupcakes‚ remove any wrappers and arrange them in a single layer. Use a sharp‚ serrated knife or a specialized cupcake cutter to slice each cupcake horizontally into two equal layers. This allows for even distribution of frosting or filling. For small round cakes‚ cut into wedges similar to a pie‚ ensuring each slice is consistent in size. For square or rectangular mini cakes‚ make parallel vertical cuts and then horizontal cuts to create uniform portions. Always use a clean‚ sharp knife to prevent tearing the cake‚ and consider using a cake server or spatula to lift and serve each portion. This method ensures every guest receives a perfectly sized and visually appealing piece.

Portion Sizes and Serving Guidelines

Party slices are typically larger (2×2 inches)‚ while wedding slices are smaller (1×1 inches). Adjust portion sizes based on cake size and guest preferences for even distribution and presentation.

Understanding Party Slice Portions

Party slices are designed to be generous and satisfying‚ typically measuring 2×2 inches in size. This portion size allows for a hearty dessert serving‚ ensuring guests feel indulged without overwhelming them. For larger gatherings‚ slices can be slightly narrower‚ around 1/2 to 3/4 inch wide‚ to accommodate more guests. Standard round cakes can yield 8-12 slices‚ while larger tiered cakes can serve up to 28 portions. Square or rectangular cakes often provide uniform slices‚ making portion control straightforward. Proper slicing tools‚ like a serrated knife‚ help maintain even cuts‚ while optional tools such as cake turntables enhance visibility for precise portioning. Always consider the cake’s height and diameter when estimating portions‚ as taller cakes may require different cutting techniques to achieve consistent sizes.

Understanding Wedding Slice Portions

Wedding slices are traditionally smaller‚ measuring 1×1 inches‚ designed as finger portions for guests. This size allows for more servings‚ making it ideal for large events. A standard 10-inch tiered cake can yield 20-24 slices‚ while a 12-inch cake can serve up to 28 guests. The smaller portions ensure everyone gets a taste without excess. Tools like serrated knives and cake stands help achieve uniform cuts. Marking the cake with a knife before cutting ensures precise‚ even slices. This method is particularly useful for tiered cakes‚ where consistency across tiers is key. Proper portioning not only enhances presentation but also ensures efficient serving‚ making the event seamless and memorable for all attendees.

Presenting and Serving the Cake

Presenting the cake attractively enhances the celebration. Arrange slices neatly on a platter or individual plates‚ garnishing with fresh flowers or dusting with powdered sugar for a polished look.

Arranging Slices for Attractive Presentation

Arranging cake slices attractively is key to impressing your guests. Start by placing larger slices at the bottom of the platter and smaller ones toward the top for a balanced look. Use a serving tray or cake stand to elevate the presentation. For round cakes‚ arrange slices in a circular pattern‚ while square or rectangular cakes can be laid out in rows. Consider alternating slice sizes and angles to add visual interest. Garnish with fresh flowers‚ berries‚ or a dusting of powdered sugar for a finishing touch. Ensure symmetry by distributing slices evenly and creating a focal point‚ such as a decorative slice in the center. This method works for both party and wedding portions‚ making the display appealing and inviting. Practical tips include serving from the back of the platter to maintain the arrangement’s appearance throughout the event.

Practical Serving Tips

When serving party cake‚ use a sturdy serving knife and fork to portion slices neatly. Warm the knife under hot water for smooth cuts. For even distribution‚ place the largest slices at the back of the platter and smaller ones in front. Garnish the platter with fresh berries‚ mint leaves‚ or edible flowers for a decorative touch. Offer serving utensils on the side‚ allowing guests to serve themselves. For tiered cakes‚ start serving from the bottom tier to maintain stability. Consider pre-slicing larger cakes to streamline the process. Always let the cake rest for 5-10 minutes before serving to prevent crumbling. Keep extra plates‚ napkins‚ and serving tools handy to ensure a seamless experience. These practical tips will help you serve your party cake efficiently while maintaining its appealing presentation and ensuring every guest enjoys a perfect slice.

Common Mistakes to Avoid

Avoid rushing the cutting process‚ as it leads to uneven slices. Using a dull knife can tear the cake‚ while cutting without a guide risks misshapen portions. Ensure the knife is sharp and handled properly to maintain even‚ clean cuts for a professional finish.

Frequently Made Mistakes When Cutting Cakes

One of the most common errors is using a dull knife‚ which can tear the cake instead of making clean cuts. Another mistake is not marking the cake before cutting‚ leading to uneven slices. Many people also rush the process‚ resulting in misshapen portions. Additionally‚ failing to use a cake stand or turntable can make it difficult to access all sides of the cake evenly. Some individuals cut too aggressively‚ applying too much pressure and causing the cake to crumble. Others forget to remove decorations or frosting before slicing‚ which can create messy results. Lastly‚ not letting the cake cool or set properly before cutting can cause it to fall apart. Avoiding these mistakes ensures a more professional and visually appealing outcome for your party cake cutting.

How to Avoid Common Cake Cutting Errors

To avoid common cake cutting errors‚ start by using a sharp‚ serrated knife‚ as a dull blade can tear the cake. Always mark the cake with light knife impressions before cutting to ensure even slices. Use a cake stand or turntable to access all sides easily. Apply gentle‚ steady pressure‚ and avoid pressing too hard‚ which can cause the cake to crumble. Let the cake cool completely before cutting‚ as a warm cake is more prone to breaking. Remove any large decorations or frosting swirls beforehand to prevent them from getting in the way. For tiered cakes‚ cut from the bottom tier upward to maintain stability. Finally‚ use a clean serving spatula to transfer slices to plates‚ preventing the cake from tearing. By following these tips‚ you can achieve clean‚ even cuts and a professional presentation for your party cake.

With the right tools‚ techniques‚ and tips‚ perfect party cake cutting is achievable. Ensure memorable experiences by serving clean‚ even slices‚ making every celebration delightful and stress-free for hosts.

Final Tips for Perfect Party Cake Cutting

To ensure flawless cake cutting‚ always determine portion sizes beforehand and use a serrated knife for clean cuts. Heat the knife with warm water for smoother slicing‚ especially for frosted cakes. Maintain sharp tools to avoid tearing the cake. For precision‚ mark cutting lines on the icing before slicing. Arrange slices attractively on a serving tray or individual plates‚ garnishing with fresh fruits or sprinkles for a polished look. Remember‚ party portions are typically larger than wedding slices. Clean the knife between cuts to prevent crumbs and frosting from transferring. For tiered cakes‚ cut from the bottom tier first and work upwards. Always cut in a gentle sawing motion‚ not pressing too hard. Finally‚ group similar-sized slices together for consistent serving. These tips will help you achieve professional results and impress your guests.